From Hoodoo Valley Idaho.

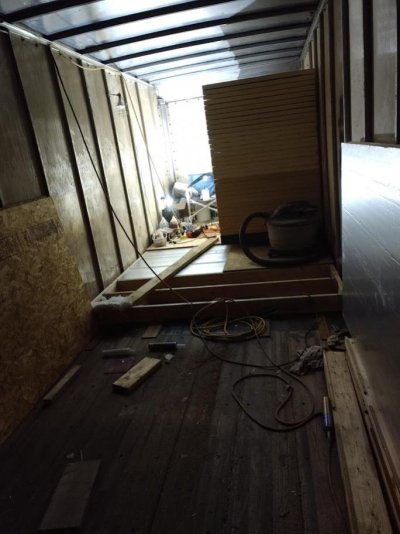
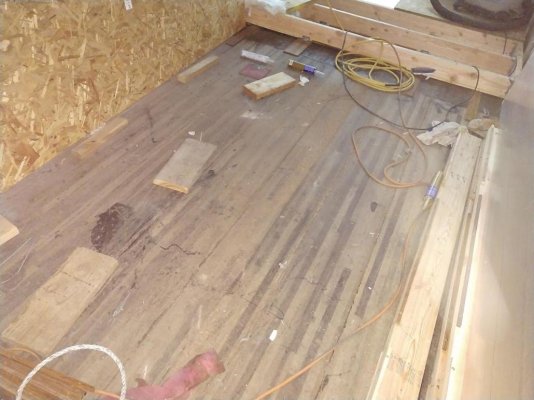
Okay, so here's my latest progress with phote's included.......


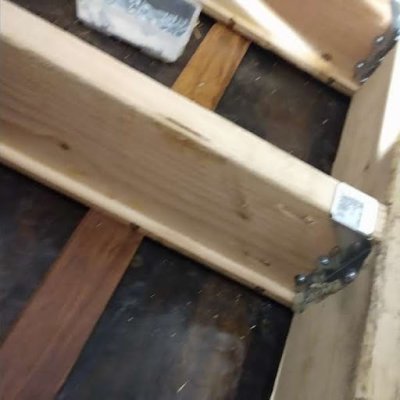
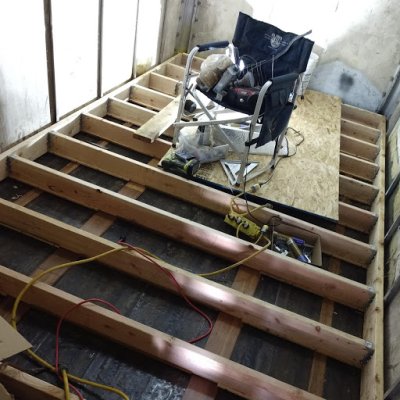
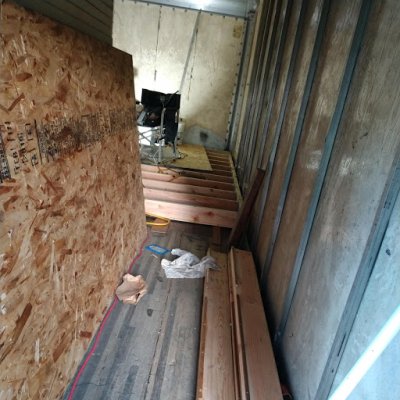
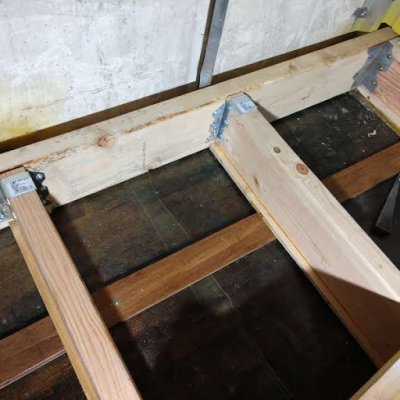
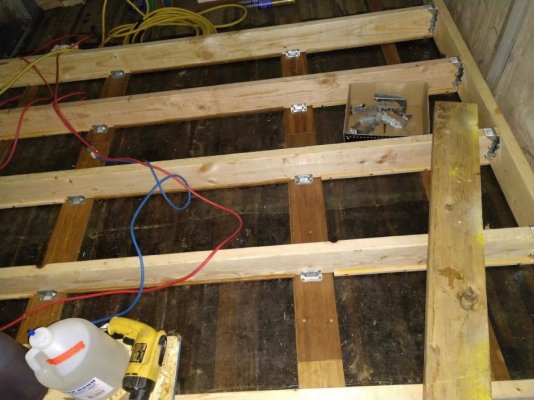
All joists up to the last 9 feet or so are in and all hangers are installed......next step is to attach brackets (already bought) that will hold the joists straight and to the floor. Will also attach a few brackets to the rim to provide maximum sheer for the floor sliding on top of the deck.
 

Attachments

  • jkryikrikrkr.jpg
    jkryikrikrkr.jpg
    38.5 KB · Views: 10
  • k76r6k.jpg
    k76r6k.jpg
    59.3 KB · Views: 10
  • uyoly6.jpg
    uyoly6.jpg
    85.7 KB · Views: 11
Last edited:
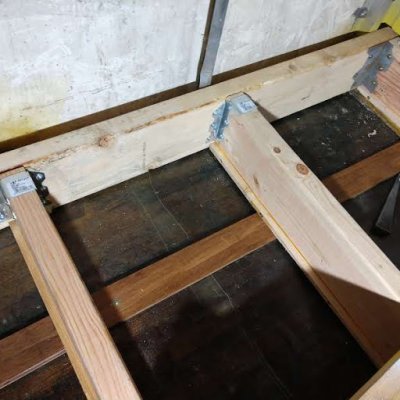
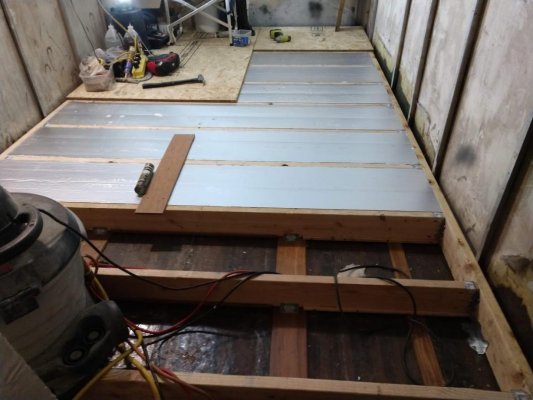
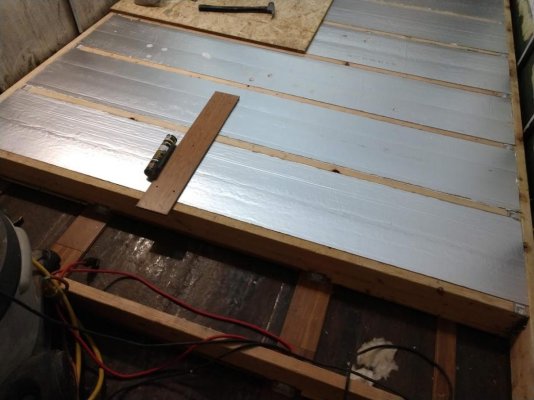
You can see the joists are up off the floor for ventilation and to keep the floor from getting wet if anything leaks. The strips of wood at the bottom of the joist will hold the insulation in place.
 

Attachments

  • .;uf;.jpg
    .;uf;.jpg
    84.6 KB · Views: 8
  • tukltuko.jpg
    tukltuko.jpg
    65.8 KB · Views: 8
Last edited:
Box van going to come off the the truck slide down freeway take few cars out and come out still unscathed intact ready to be hitched back up, only problem on your end is few tossed dishes and your bed mattress tossed around. Nice work...
 
That's certainly my concern. At least the internals moving around inside the box. Wish I was an engineer, but going to have to combat this issue as best I can because just as the Kinks song goes...... "I'm on a low budget". I simply don't have the money to get consultation!
 
Last edited:
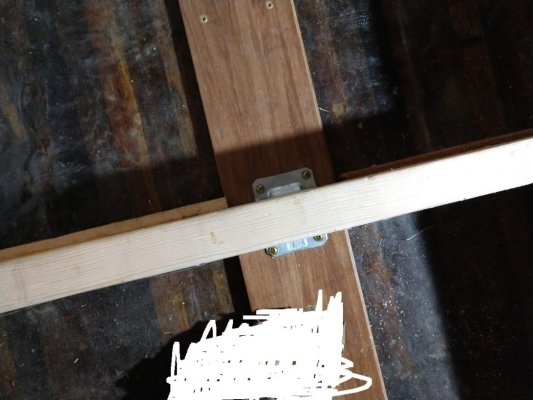
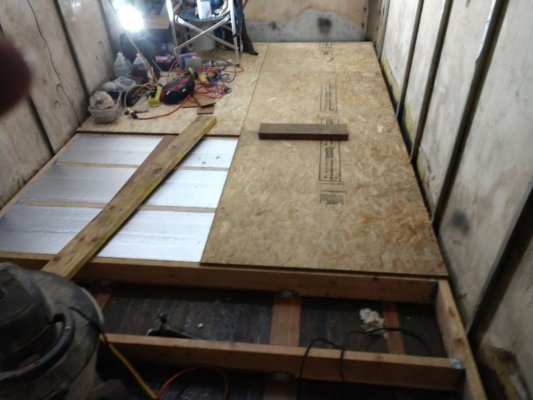
Little progress updates.......... 1 AM this morning, I went out and correctly positioned the floor, then mounted it to the wood deck from the rim joists using angle brackets. Then, I attached every floor joist to the floor through the bamboo runners using small brackets. This was more to hold the bottoms of the joists against warping and allowing gaps in my closed cell insulation, but also to keep the floor as a whole, from shifting. Tonight I start running the closed cell insulation through the table saw, and might start installing. Photos coming.....
 
Here's some phote's.........
 

Attachments

  • IMG_20190630_220438198.jpg
    IMG_20190630_220438198.jpg
    91.4 KB · Views: 6
  • IMG_20190630_220532305 recent recent.jpg
    IMG_20190630_220532305 recent recent.jpg
    95.9 KB · Views: 5
  • tukltuko.jpg
    tukltuko.jpg
    65.8 KB · Views: 5
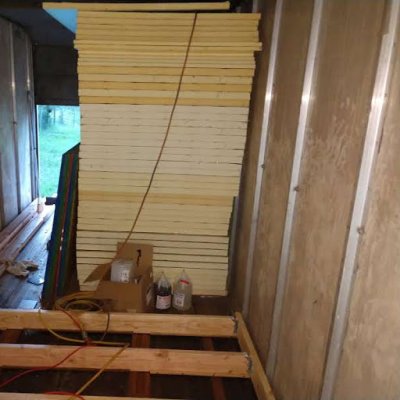
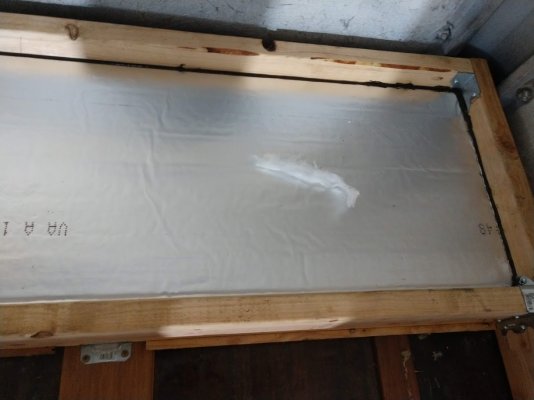
Installing the closed cell. Caulking each layer with silicone. Finally moved the stack of rigid after nearly a year at the door.
 

Attachments

  • IMG_20190704_102957014.jpg
    IMG_20190704_102957014.jpg
    99.9 KB · Views: 6
  • IMG_20190705_234629834.jpg
    IMG_20190705_234629834.jpg
    89.3 KB · Views: 7
  • IMG_20190705_234643876.jpg
    IMG_20190705_234643876.jpg
    89 KB · Views: 4
  • IMG_20190706_003802849.jpg
    IMG_20190706_003802849.jpg
    88 KB · Views: 14
  • IMG_20190706_010742386.jpg
    IMG_20190706_010742386.jpg
    74.5 KB · Views: 8
Now to prep the last 11 feet of floor, then fiberglass. Still a little welding on the curb.
 

Attachments

  • IMG_20190706_010748986.jpg
    IMG_20190706_010748986.jpg
    94.1 KB · Views: 10
Surprised you didn't run the water lines in the floor just in case they leaked or are they running under the floor structure you got in? Personally would of ran PEX below it all to where the lines needed to come up then ran them through the polyurethane foam upwards. What is your plans?
 
I absolutely don't want anything to freeze, and it's been -35 here before. I also want to be able to access the water lines and electrical in case of failure. I also fear fire especially with that closed cell insulation. Therefore, water and electrical are going to be run just inside of the exterior walls, in the interior space inside specially built baseboard (pipe chase). I'm still a ways away, but I'm hoping to be on that before the weather starts changing in September.
 
Last edited:
Many probably will see this as excessive but I used to live in a 1968 Airstream travel trailer back when I was younger. I just remember struggling to heat the space in the Winters and vowed that I was going to build this space to not only last...... but to be easily heated!
 
I don’t see it as excessive, then again you seen my work too, just intelligent way to do it. My thinking was you were going to insulate the under belly of the rig and run PEX between the two layers of insulation without any connectors underneath just at points of where the PEX comes up such as water stops. Though the pipe chase works well too with drain points if the PEX connections break loose and conduit for the electrical. That’s one thing I like about spray foam insulation it was fire resistant and I tried setting piece on fire it just smoldered out. Running stranded wire in there right¿
 
I had thought about insulating underneath to gain more height, but decided against it. I'll have 7 feet of ceiling after insulation. Enough to keep me from hitting my head!


This is a unique build. I started out just intending to build a tiny house, then slowly started morphing towards off grid if need be, at least keep that option in sight. The forward portion is going to sort off serve as storage / living space whereas the rear section is going to be primarily living with a shower and toilet. Was at first going to do a regular set up for tapping into shore power / septic, now re thinking that, with the possibility of having a black water tank and letting gray water pour on the ground. Did the gray water thing for years and years on my home. I really love soft intricate lighting and so for my lights I was intending using the lights shown here on dimmers to illuminate the floors, then possibly overhead lights build into chases along the exterior walls. I was contemplating using solid wire as in direct burial of the proper gauge, but still always eager to learn better ways..... should I be looking at strand wire? I have rolls of it from projects. My water lines are going to be copper because I hate Pex even though I know it's better. I've installed a crap ton of both, but I much prfer the neatness of sweated copper! The plumbing is designed in my build to be the absolute minimum, so everything is going to be grouped together fairly tight.
 
Last edited:
Take a piece of stranded wire and flex it as much as piece of Romex wire and see which one breaks first, that's what's going on as the wire vibrates in vehicle. I also advocate the use of marine tinned wire cause it's most resistant to any corrosion and the strands are thinner to offer more flexibility. Ancor is the brand I use but there is others out there such as Pacer group.
Don't I repeat don't use wire nuts on stranded wire if you don't already know, it cuts into Romex and it's how it holds, it would cut the strands on stranded wire. Want to get really good at wiring, read into ABYC codes and RVIA rules and regulations combined with NEC. Remember 3% voltage drop is the max and Blue Seas has a calculator to size up what you need.
 
Sorry for the delay in responding.... been so busy!


I've done a great deal of household and commercial electrical, though not up on the latest codes which are always being modified, and I so disagree with some of the notions in what is being done today. I was aware of the wire nuts regarding strand wire and the flexibility issue as well, although I wasn't really thinking about that in my application. I know that in commercial applications they use strand wire in conduit and so I suppose that I could use conduit as well, within the chases in my build. I really would like to use copper plumbing in my set up, and already was going to incorporate flex in certain areas for vibration / shifting, but really should use pex. I already have the tools for both. I just like the neatness of copper, but you can also buy straight lengths of pex as well.
 
As for my latest update........ All floor framing is completed up to the point of having to fiber glass the remaining 10 feet of wood deck. Last night I laid down 2 feet and did repairs to the surface areas of minor damage, and putting in missing screws from when I pulled all the wood flooring up, and was waiting for the new 5/16 self tapping screws to show up. My knees are super super bad from high mileage and so I can only kneel for X amount of time while I sweat bullets in pain. I largely lay on my side as I work, but here again, a person can only spend so much time on an elbow that is also gainked from years of swinging a hammer. Getting that fiber glassing and floor framing done will be cause for opening a bottle of wine as it signifies the end of the most grueling aspect of my project. Walls and lid will be cake!
 
It's understandable of being busy no quick replies needed here. Yes some of the codes are far fetched useless though I like the ABYC ones best since they are more feasible and put in most severe environment just like when I built a house I never finished (long story in itself, I lost the house). Built to Miami-Dade building codes when only lesser codes needed. Who cares if the PEX going straight or not, won't see it anyways and more reliable to constant temperature change of expanding and contracting of the material plus the vibration that will be going on. Just think, if you can flex piece of Romex going down the road imagine what that copper pipe is going to do on the soldering joints, plus less chemicals in the line. Wine I guess will work for the small feat of completing part of it, but when you get this project done you better break out the bourbon.
 
Jim Beam under the counter right now.......


It sucks that I'm so detail oriented and really particular about neatness. I agree that Pex is better, but it drives me batshit crazy when I see horribly installed pex. I haven't worked through all the details yet, and still a ways away.

Got another 2 feet closer to the back door on the glassing. 6 feet to go.........
 
Last edited:
Tonight I completed the remainder of the floor joists, adding the 1/2 inch strippage to the bottom sides to hold the rigid insulation in place. Loaded my welder and bottle via the lift gate for some welding to the curb that I hadn't finished yet. That'll happen tomorrow night.
 

Try RV LIFE Pro Free for 7 Days

  • New Ad-Free experience on this RV LIFE Community.
  • Plan the best RV Safe travel with RV LIFE Trip Wizard.
  • Navigate with our RV Safe GPS mobile app.
  • and much more...
Try RV LIFE Pro Today
Back
Top