And so the adventure begins.

Atlanta

Soo, the big move is over. I came down from Maine to Atlanta GA this weekend. Actually I started driving Thursday. 22 hours over 3 days. Spent the night at a TA, moved out after the morning rush.

Truck did ok on the run down here. Couple suprises.
Things shifted more than I expected. I took many short trips with the truck while moving the show from town to town, but no long haul stuff.
And the big (and unpleasant) suprise.. I blew out a brake line in the driveway of the rehab house I am working on. Suppose it could have been worse, it could have blown out while on the road. But I think the brakes are fine, it's the parking brake that went. (the IH4700 does not have a park in the trans.. has a parking lever you pull up instead. Not sure how much that is going to cost me to get fixed... on a shoestring budget with this first housing project. Also why I have not finished the truck...waiting to sell the first rehab and have extra money to spend.

Has anyone installed an isolator for the RV batteries? I cant imagine it's that hard, and I would rather run the truck to recharge the batteries than drag out the genny every day..
 
I have a 4700 and my P brake is just a cable.I know,I spent a day trying to figure out why I wouldn't move, to find out it would, if I hadn't sunk up to the front axle in soft ground.
 
Last edited:
I have a 4700 and my P brake is just a cable.I know,I spent a day trying to figure out why I wouldn't move, to find out it would, if I hadn't sunk up to the front axle in soft ground.

Well I am sitting on concrete, so no worries about sinking. But I am thinking it's more than the cable, a warning buzzer sounded, I got out, and fluid was pouring out of a connection right by the driver side axle (flex hose connecting to a mounting bracket). I will get around to looking at it this week. Still trying to get settled in, I have 10 lbs of chit in a 5 lb bag and trying to get the truck livable again. (I brought all my tools to fix the forclosure I bought, and I am up to my ears in crap).
It would be nice if all I needed to do was swap out a cable, I could do that myself.
 
Hello everyone. I am back. And headed back on the road again. Maybe, lol. Turns out my insurance agent (RV America in CA) didnt tell GMAC the truth about my truck, so when I called to do a change of address, a long conversation ensued. End result, when my policy comes up in May, GMAC will not be renewing it. Reasons given were that the truck was on the road full time, and in multiple states. I replied it didnt make much sense to own an RV and stay in one state. Ah well, one more thing to try to resolve.

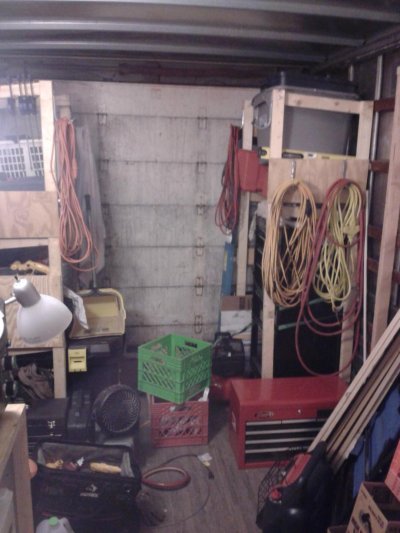
Anyhow, I took everything out of the RV when I got here, I was planning on selling the truck. Then I got a job offer to head back on the road, which I am still planning on doing. At least the truck will earn back the money I put into it. But, now I have to put it all back together, lol. I will post pics when it's close to finished. Right now it looks like a hurricane hit the inside of it. And I made some changes, added another 4 feet of living space for a new bedroom. People new to the forums might not think 4 feet is a lot of space, but when you only had 12' to start with, an extra 4 feet is HUGE :)
 
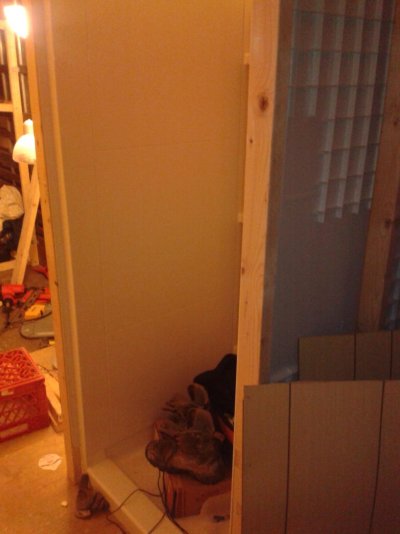
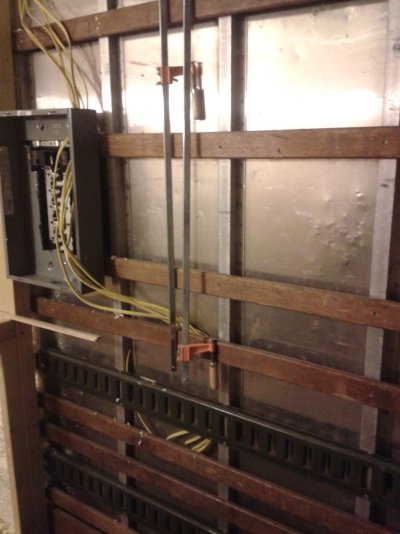
So a couple of not-quite before pics, but before everything is finished. One fairly large mistake was the wall covering. I went cheap and used a mdf based panel. Bad idea. The panels were partially rippled when I bought them, I thought they would lay flat against the wall, I was wrong. Eventually (in November when I come off the road) they are all coming out and being replaced with 1/4 sanded plywood that will be stained a light color. That is what I am doing for the new bedroom area in the back.

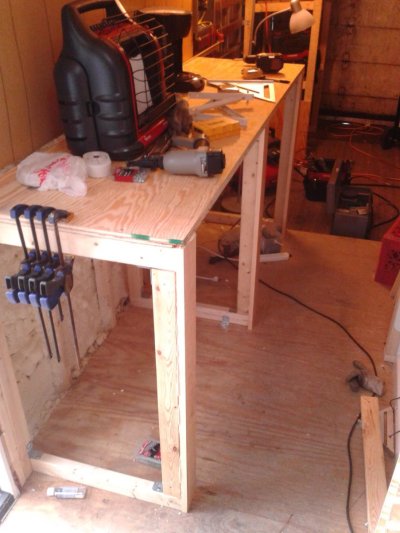
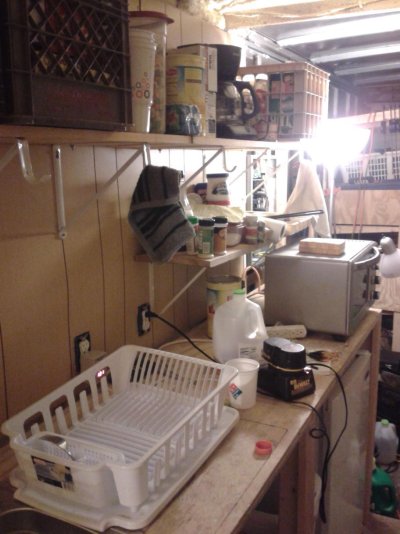
You can see the platform for the kitchen counter (24X80) which is 1/2 plywood ripped in half and screwed/glued together. Lot cheaper than the 90 bucks they wanted for a 'countertop'. The two pics of the exposed truck walls are where the new interior walls will be installed, and the new bedroom will end up. Edit: only one pic of the soon to be new bedroom area. only pet me upload 4 pics.

Also an exterior of the new paint on the box. Looking at the 'before' pics when it was still an 'Atlas' truck, I have to say it came out looking ok, even before I finish the blue trim on the bottom. And you probably wouldnt believe that I did it with a roller, but I did :rolleyes:
 

Attachments

  • tr3.jpg
    tr3.jpg
    105.4 KB · Views: 26
  • tr5.jpg
    tr5.jpg
    109.4 KB · Views: 28
  • tr6.jpg
    tr6.jpg
    104.1 KB · Views: 25
  • tr8.jpg
    tr8.jpg
    110.2 KB · Views: 26
Last edited:
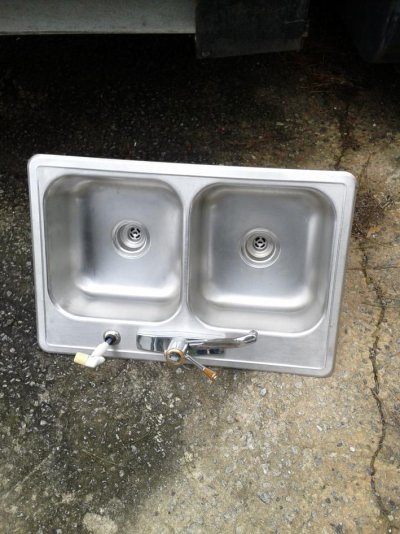
So I continued to work on the 'kitchen area' and ran into a minor snafu. The sink (which I got for cheap..30 bucks including faucet, mounting hardware and piping) just wont fit. I wanted a single bay sink, but this one was really cheap so I thought I would make it work. No biggie, I will use the sink on the rehab when I get back in November.

I admit I had some doubts about the framework I built, it was a little too 'flexible' for my taste initially. Once I had the countertop on, and everything screwed together, it was rock solid. Yanking on it, it wont move (but it did move the whole truck with the effort, lol).

Going to build the walls and floor for the bedroom and get that closed in over the next couple days. Insulation has to be my single biggest expense for this truck so far. The little 4' bedroom I am adding on cost 190 dollars just for the 2" rigid foam panels. *sigh* At least I will be comfortable regardless of the weather outside, lol :)

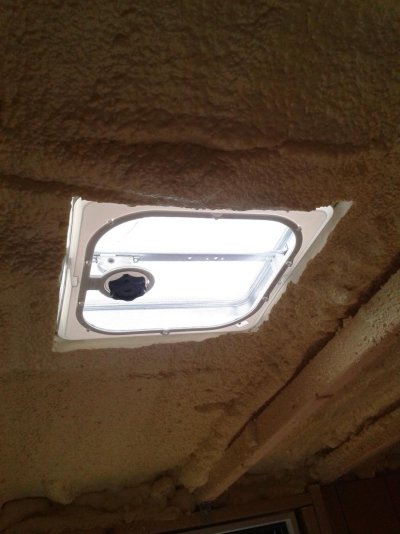
The roof vent was crazy simple to install. I was having panic attacks about punching holes in the roof, but all seems well, had an awesome rainstorm last 14 hours, and no leaks. And the light it lets in is great. I am going to install at least 1 more, possibly two more just for the added light. But I will install those when I am out on the road. If I do it right as we move into a new town, the special caulking I use will have almost a week to cure, which should be more than enough time.
 

Attachments

  • kc1.jpg
    kc1.jpg
    113 KB · Views: 17
  • sky1.jpg
    sky1.jpg
    107.8 KB · Views: 16
  • sink1.jpg
    sink1.jpg
    114.8 KB · Views: 17
Last edited:
I was afraid of cutting a hole in my roof too, but now I wish had done it years ago. Get a Ventmaxx, then you can leave the hatch open in the rain. I no longer have moisture issues in my truck since installing one.
 
I was afraid of cutting a hole in my roof too, but now I wish had done it years ago. Get a Ventmaxx, then you can leave the hatch open in the rain. I no longer have moisture issues in my truck since installing one.

Here in southern Texas, there is very little rain. So I am not worried so much about rain as I am about letting the heat out of the truck. It hit 90 a couple times so far, and it was waaaarm in the truck, lol. I am thinking about a cheap wall mount AC unit. I think it would look fairly horrible with an ac unit sticking out of the side of the truck, but I may have no choice. Dont think the roof would support a roof mounted unit.

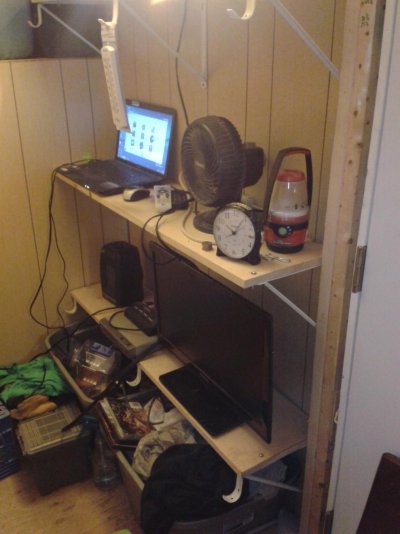
New show, new ideas. There are 3 International 4700's in the fleet, other than mine. All have homemade boxes under the frame, and they look decent. I think I will be adding those shortly. I am still trying to sort out 10 lbs of $%^& in a 5 lb bag. Eventually it will all be sorted out, and will work well. One small step at a time.
 
What about a mini-split a/c unit? Those look pretty nice. You can mount the outside unit in a box underneath and then the inside unit high on the wall inside. Guessing they might be a little more expensive than a wall/window mount unit.
 
I know this is a crazy brainstorming idea, but...

I wonder if it would be possible to mount a large inexpensive window unit type a/c underneath in a underbody box, and have a big curved 90 degree duct pointing up through the floor of the truck? Maybe sounds crazy, but why wouldn't it work? The box would need a door to open up to circulate outside air and let heat out of the box, but that's no big deal, every box needs a door anyway. My buddy has a gooseneck trailer and didn't want to drop the coin on a roof mount rv a/c so he mounted a window unit in the bulkhead under the gooseneck (pointing towards the rear of the trailer) and has a drop door in the diamondplate facia on the outside that he opens when he runs the unit. All hidden above the landing gear. Why not do the same thing in a tool box? I'm picturing a home furnace type duct the size of the front of the unit, curves up to a big grate in the floor of the truck. Wouldn't be the prettiest thing to have a grate in the floor, but it would be cheap particularly if you know somebody in the heating business that can make the duct. And a $100-$200 Walmart a/c (or next to nothing used on craigslist) would be the guts of it, which can be cheaply replaced down the road if it goes bad. And all hidden inside a box so it would look good. Crazy?
 
You'd be surprised how little bracing there is in a factory trailer roof for the a/c unit. My top of the line Pace trailer was "wired and braced for a/c" at the factory, and all it had was the standard 1 x 1.5" light duty rectangular tubing they use in the roof bows anyway, with a couple of short pieces of the same rectangular tubing to make a 14x14 square (same size as a roof vent) and stuck some wood in to fill the gap between the roof sheet metal and the interior ceiling. I was mighty suspicious of that when I installed my rood a/c in that hole, but it has been on there for 2 seasons and a ton of miles so far with no ill effect. So I wuoldn't worry too much about the bracing in the roof, that is the easy part. Worst thing on the roof a/c is the $900 cost (heat pump) of the unit.

If you go that route, spend an few extra bucks and spring for the Carrier heat pump instead of the standard a/c with heat strip. That unt is 15,000 btu instead of the standard 13,500 btu, but the best thing is that being a heat pump it will also deliver the full 15,000 btu as heat just as well as a/c. The heat strip they advertise in a standard a/c does about nothing, and you said you generally have power to plug into so you kill 2 birds with one stone.
 
So I havent posted in a little while, couple pics for an update. Work is slow when you are living in the truck....lol

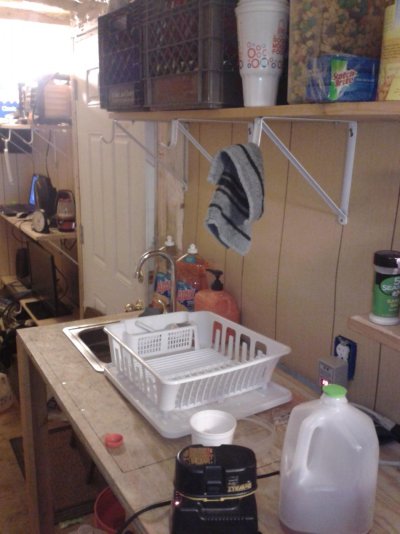
Sink is in. Think I posted about this earlier, maybe not. I got a great deal on a double sink I was originally going to put in. Turns out, it didnt fit. My countertop is 24 inches and the sink needed a 22 inch opening. Ooops. So I got a little bar sink from a discount store for 60 bucks new (included faucet so was a decent deal) Little kitchen area is almost finished. Just need to add the water heater under the counter. At this point, I might not even bother. I am in Texas, and it's already upper 70's here.. not a lot of need for hot water.
 

Attachments

  • TI1.jpg
    TI1.jpg
    108.2 KB · Views: 24
  • TI2.jpg
    TI2.jpg
    113.9 KB · Views: 22
  • TI3.jpg
    TI3.jpg
    114 KB · Views: 23
  • TI4.jpg
    TI4.jpg
    112.1 KB · Views: 22
You'd be surprised how little bracing there is in a factory trailer roof for the a/c unit. My top of the line Pace trailer was "wired and braced for a/c" at the factory, and all it had was the standard 1 x 1.5" light duty rectangular tubing they use in the roof bows anyway, with a couple of short pieces of the same rectangular tubing to make a 14x14 square (same size as a roof vent) and stuck some wood in to fill the gap between the roof sheet metal and the interior ceiling. I was mighty suspicious of that when I installed my rood a/c in that hole, but it has been on there for 2 seasons and a ton of miles so far with no ill effect. So I wuoldn't worry too much about the bracing in the roof, that is the easy part. Worst thing on the roof a/c is the $900 cost (heat pump) of the unit.

If you go that route, spend an few extra bucks and spring for the Carrier heat pump instead of the standard a/c with heat strip. That unt is 15,000 btu instead of the standard 13,500 btu, but the best thing is that being a heat pump it will also deliver the full 15,000 btu as heat just as well as a/c. The heat strip they advertise in a standard a/c does about nothing, and you said you generally have power to plug into so you kill 2 birds with one stone.

So I looked into the whole heating/cooling thing a little bit, and Bob had a great idea with the mini-split system. Couple people have them. I think Doc has one, and he and I have similar trucks. Initially I balked at the price, but I noticed a couple on eBay that is are in the 500-700 dollar range. And they do both heat and cooling. 500 bucks I can live with. And the sizing is right too. 9000 btu is all my truck needs. I only have 18-20 feet of box as a living area. Hell, the entire box of 25 feet X 8 is still half of what the unit is supposedly rated for (400 sqf) I am a little skeptical though, the power rating is only 770 watts for heat or cooling. Either this unit is insanely more efficent than anything I have, or it's not going to get the job done.
 
And now my truck can hang with the big dawgs...lol.
Installed 50 amp service today. Mounted an external box and wired it into the breaker panel. Not the prettiest in the world, but effective. Whole thing, wire (380) plugs (100) box (40) was 600 bucks...give or take. And that is what the wire alone would have cost me (165 feet) and to buy RV cord at that length, forget about it.

Its the time of year I really don't need one, but I am going to install a residential water heater next week I think. Small 20 gallon point of use unit is all I will need (I live alone, that size would never work for a family). And the single element design might mean waiting a little longer initially for hot water, but also wont tax my new found power supply. My only concern is it might be too fragile to travel. Disclaimer right on the labels say they are not for RV use, but I am sure more than a little of that is to cover the manufacturer's butt. The water heaters in the bunkhouses where the majority of the crew sleeps, are all 60 gallon residential heaters.
 

Try RV LIFE Pro Free for 7 Days

  • New Ad-Free experience on this RV LIFE Community.
  • Plan the best RV Safe travel with RV LIFE Trip Wizard.
  • Navigate with our RV Safe GPS mobile app.
  • and much more...
Try RV LIFE Pro Today
Back
Top