You are using an out of date browser. It may not display this or other websites correctly.
You should upgrade or use an alternative browser.
You should upgrade or use an alternative browser.
bushpilot-TC
Senior Member
man I SO wanted a cascadia when we were looking!
hope this lighting issue works out for you.
I got in a hurry - trying to wrap up the body work, paint etc from our blow out so I could make it out to Barber Vintage Fest a couple of weeks ago.....so I just went back to the shitty OEM lights...im gonna give some LED inserts a try.
hope this lighting issue works out for you.
I got in a hurry - trying to wrap up the body work, paint etc from our blow out so I could make it out to Barber Vintage Fest a couple of weeks ago.....so I just went back to the shitty OEM lights...im gonna give some LED inserts a try.
petrel-TC
Senior Member
Thanks. I can't wait to get them on the road.
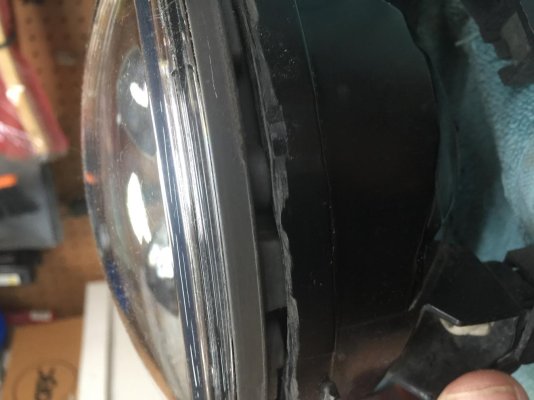
Now I have discovered that one of the Deep Space Lighting Morimoto Fog lights has broken! It appears that the adjustment mechanism broke off. Oh well. If it is mechanical, it breaks.
Now I have discovered that one of the Deep Space Lighting Morimoto Fog lights has broken! It appears that the adjustment mechanism broke off. Oh well. If it is mechanical, it breaks.
bushpilot-TC
Senior Member
Thanks. I can't wait to get them on the road.
Now I have discovered that one of the Deep Space Lighting Morimoto Fog lights has broken! It appears that the adjustment mechanism broke off. Oh well. If it is mechanical, it breaks.
David is a member here (and on the truck conversion FB page)....im sure he'll make it right.
petrel-TC
Senior Member
I've tried to contact David on his site and by phone, no luck. Any suggestions?
petrel-TC
Senior Member
The Freightliner dealer blessed the alignment of my new headlights last week. If you are going down the road and someone's leds are shining in your eyes, it ain't me
JW Speaker 6045 fog lights and brackets have arrived. I hope I can get them installed with minimal modifications.
JW Speaker 6045 fog lights and brackets have arrived. I hope I can get them installed with minimal modifications.
petrel-TC
Senior Member
man I SO wanted a cascadia when we were looking!
hope this lighting issue works out for you.
I got in a hurry - trying to wrap up the body work, paint etc from our blow out so I could make it out to Barber Vintage Fest a couple of weeks ago.....so I just went back to the shitty OEM lights...im gonna give some LED inserts a try.
FWIW, Headlightrevolution.com has a very informative video on their youtube channel about led bulb upgrades. They cover quite a few options, pros and cons, etc. May be worth a watch if you have time.
petrel-TC
Senior Member
Fog lights are in!
The JW Speaker fog lights are in now and should complete my light show for some time.
I am not crazy about the way the speakers install. I actually called them and sent them dry fit photos to be sure I was going about it the right way. However, they are in. They really do a nice job, in spite of their bug eyed look.
Can't wait for a night run to really test everything out. Unfortunately, we are in the heat of the deer rut here and the roads are the worst deer killing fields I've ever seen. I already had one put my f450 in the shop for 3 weeks, before the rut!
Attachments
Petrel do you have any pictures of the modifications you had to make to the stock buckets to mount the Evolution 2's? I plan on(and have been planning for several years now) doing something similar to my Haulmark/Coronado soon, the stock stuff sucks. I don't do much night driving when I am RV'ing but for those few hours a year it sure would be nice to be able to see where I am going.
petrel-TC
Senior Member
I posted a few pics and a description over here for another gentleman who was interested:
https://www.thetruckersreport.com/t...iner-coronado-headlight-upgrade.526900/page-1
Let me know if I may be of any other help.
https://www.thetruckersreport.com/t...iner-coronado-headlight-upgrade.526900/page-1
Let me know if I may be of any other help.
petrel-TC
Senior Member
Thanks for posting. Pretty much what I had envisioned.
So to hold the new LED lights into your custom buckets you used the just the retaining ring from the JW Speaker mounting kits?
What you did addressed one of my concerns quite effectively, having a mount that allows for aiming properly. I was looking at the manufacturers mounting kit and was was wondering if it could be mounted under the bezel in a manner that wouldn't require a bunch of trial and error to get it close enough to allow for fine tuning.
Now I just need to save up for a whole bunch of LED's (headlights, fog lights and DRL/signal lights)and convince my wife that it is truly worth it for the little night driving we do.
petrel-TC
Senior Member
Yes. I figured that ring is all that holds any sealed beam bulb in place, so long as the fixture is fitted properly. With regard to adjustment, I never touched the adjustment knob on the mounts. When I took the truck in for inspection, the guy said they were right on the money.
Like you, I typically plan to avoid night driving (unless going through the NE). One dark, rainy night was the tipping point for me making the new lights a priority.
Like you, I typically plan to avoid night driving (unless going through the NE). One dark, rainy night was the tipping point for me making the new lights a priority.
petrel-TC
Senior Member
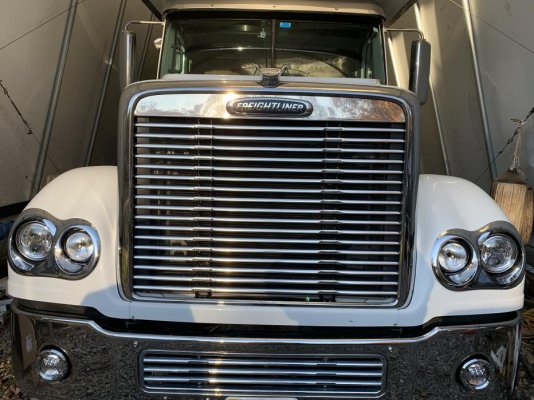
Drove to Charleston and back last week. Got a chance to try out the new lights for a couple hours. I was very pleased to see that my field of view was much better illuminated on low beam, and the high beams just create a white lit corridor, highway width and over 125yds long! The best news was that the low beams are so focused that not once was I "flashed" by oncoming drivers, and I did not see anyone in front of me adjusting their mirrors when I approached them or they overtook me from behind.
I chalk this up as a win win. I can see much better and further, and I am not "that guy" going down the road blinding my fellow motorists!
I chalk this up as a win win. I can see much better and further, and I am not "that guy" going down the road blinding my fellow motorists!
longjohn-TC
New Member
Very nice.Looks like OEM lights. Maybe you would consider sharing the workup with other Coronado owners.
petrel-TC
Senior Member
Very nice.Looks like OEM lights. Maybe you would consider sharing the workup with other Coronado owners.
This is the write up I posted on the truck forum:
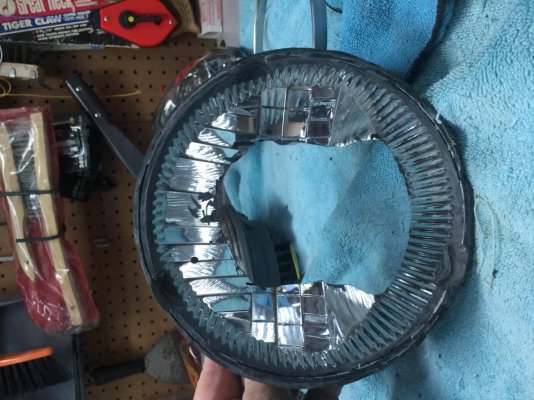
i bought two new freight liner headlight assemblies and a set of Jeep headlight retaining rings and set them aside. Then I removed the factory headlights from the truck , carefully cut away the lenses, right in the seam between the clear lense and the black housing.
Then I removed the bulb mounting hardware from the back of the headlight and retained the screws. I then cut away the back of the headlight as pictured in my thread.
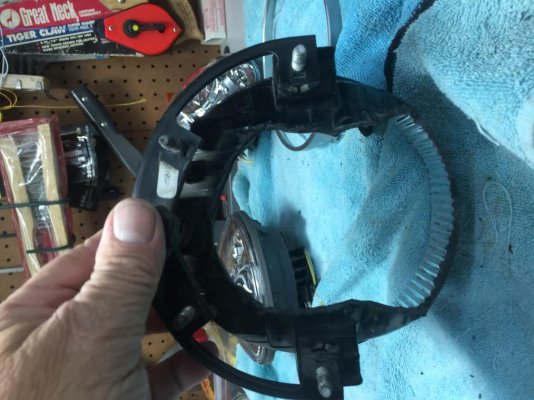
Once the housing has been trimmed up and cleaned up, you must very carefully mark it for the replacement headlight positioning tabs. Once you are satisfied with the alignment you can notch the housing to receive the new light alignment tabs. Do this in stages, the tighter the fit the better.
Once the new light housing is fitted to the custom cut light bucket, you can fit the retaining rings. The tabs on them must be bent flat, so you can use the screws you saved from the bulb mounts to secure the rings. It really helps to have someone press the retaining ring down onto the housing, while you mark the holes. That way, the new light will be held in the bucket very snugly.
Once assembled, they go right back in the truck as before. Remember to use blue loctite on the bezel screws, and don’t overtighten them. Then install your custom wiring harness.
Try RV LIFE Pro Free for 7 Days
- New Ad-Free experience on this RV LIFE Community.
- Plan the best RV Safe travel with RV LIFE Trip Wizard.
- Navigate with our RV Safe GPS mobile app.
- and much more...


