You are using an out of date browser. It may not display this or other websites correctly.
You should upgrade or use an alternative browser.
You should upgrade or use an alternative browser.
mmmc101
Senior Member
Kenn,
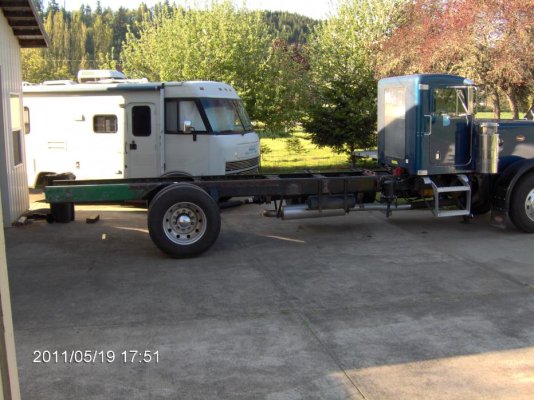
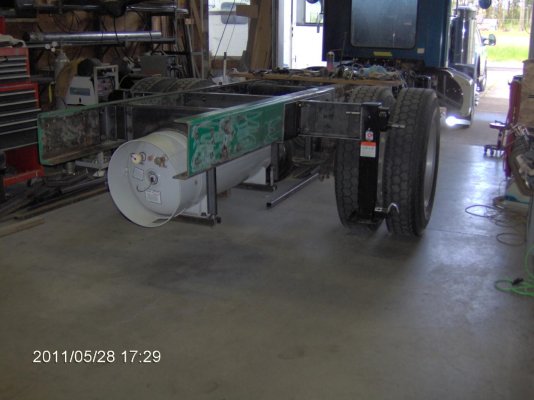
I think them "Okie" airbags are going to make it ride a little rough.....lol. Frame extension looks really good. Looks like a good location for the LP tank. MMM
I think them "Okie" airbags are going to make it ride a little rough.....lol. Frame extension looks really good. Looks like a good location for the LP tank. MMM
Kenn-TC
Senior Member
LPG tank
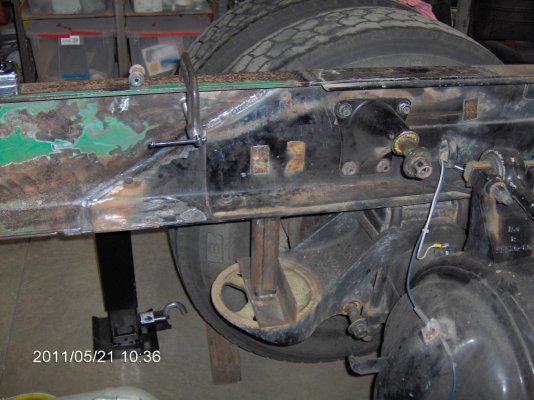
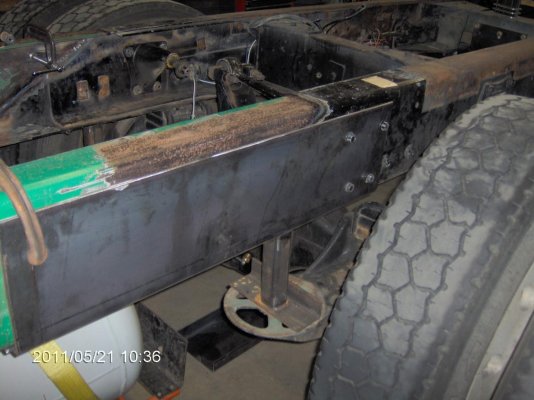
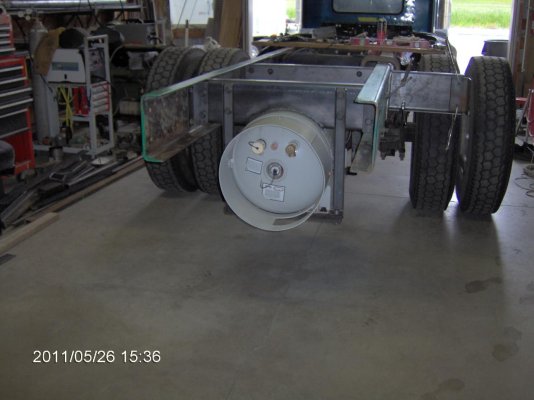
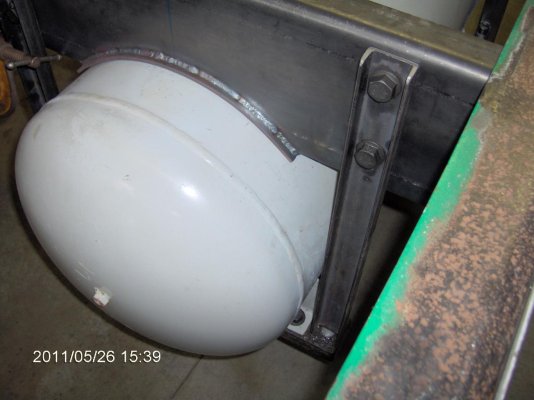
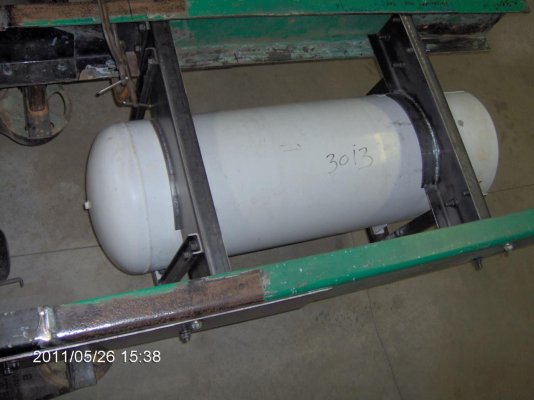
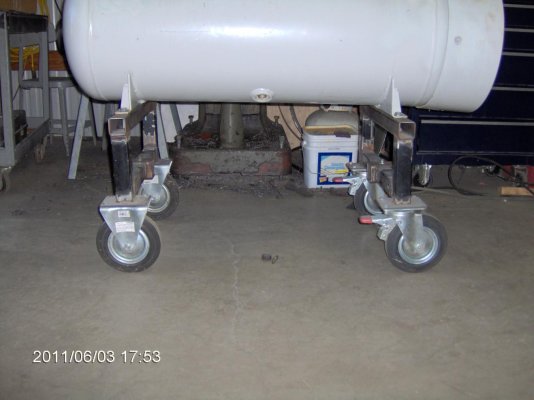
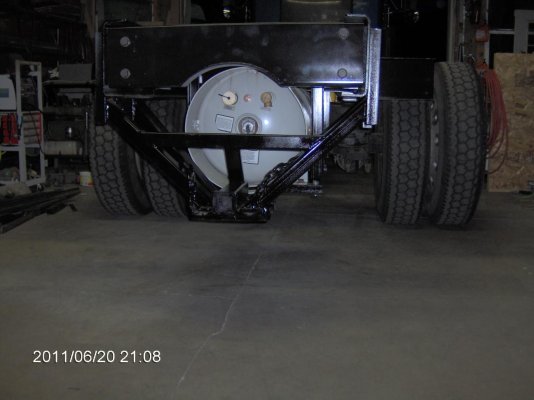
It took a few days and two trips to the steel store, but the LPG tank is now mounted. I will add a 1/4" x 3" rubber strip between the top of the tank and the cross members. I ended up with 17" of ground clearance. I will add a third cross member at the back and it will have the same 9" radius cut out to make room to fill the tank. Next up will be to make mounts for the leveling jacks. It feels good to be doing metal work and not truck repairs.
It took a few days and two trips to the steel store, but the LPG tank is now mounted. I will add a 1/4" x 3" rubber strip between the top of the tank and the cross members. I ended up with 17" of ground clearance. I will add a third cross member at the back and it will have the same 9" radius cut out to make room to fill the tank. Next up will be to make mounts for the leveling jacks. It feels good to be doing metal work and not truck repairs.
Attachments
hyderbound
New Member
- Joined
- Jun 1, 2011
- Messages
- 1
Greeting
I just joined. Your thread was the first to be seen and that is a very smart and secure placement of the propane tank. Is there a limit to the size of tank and must placards be displayed? I have a 9200 Int big pro sleeper that's in the process down in Idaho, (Im in Alaska) I hope to bring it up if not in Sept then in May next year. I was considering putting a (170 gal I think) on it. the tank was approx 28 x 94 in. Any comments, advice, or suggestions would be appreciated.
I just joined. Your thread was the first to be seen and that is a very smart and secure placement of the propane tank. Is there a limit to the size of tank and must placards be displayed? I have a 9200 Int big pro sleeper that's in the process down in Idaho, (Im in Alaska) I hope to bring it up if not in Sept then in May next year. I was considering putting a (170 gal I think) on it. the tank was approx 28 x 94 in. Any comments, advice, or suggestions would be appreciated.
Bob86ZZ4
Senior Member
The only thing I've heard about the propane tank is you can't lock it. Most rv's don't have locking doors over the propane tank because of that rule. And I think you might have to put some label on the outside of the cover saying that's where the propane is. At least my two rv's had that door labeled as such.
Looks cool. Glad you're getting to work on it.
Looks cool. Glad you're getting to work on it.
Kenn-TC
Senior Member
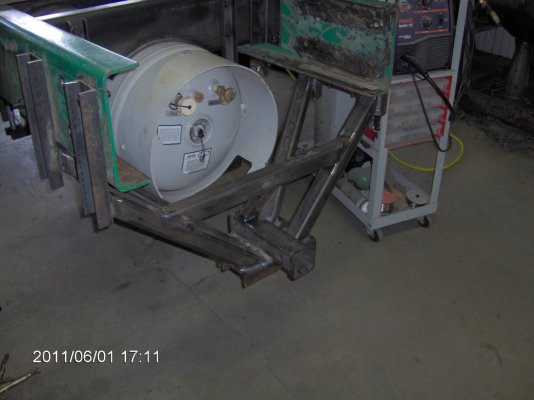
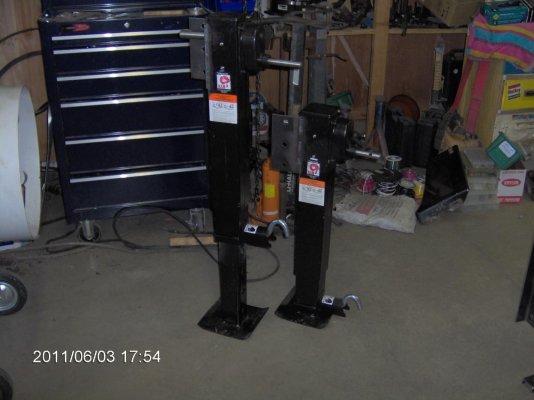
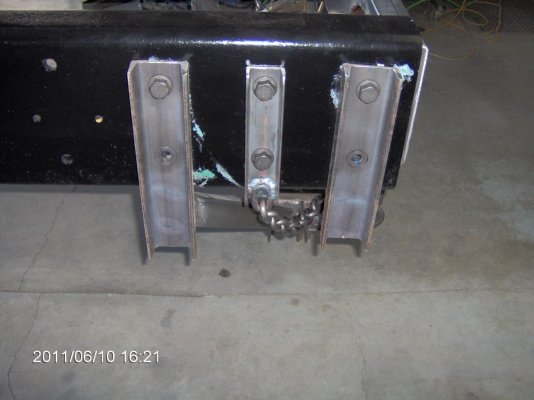
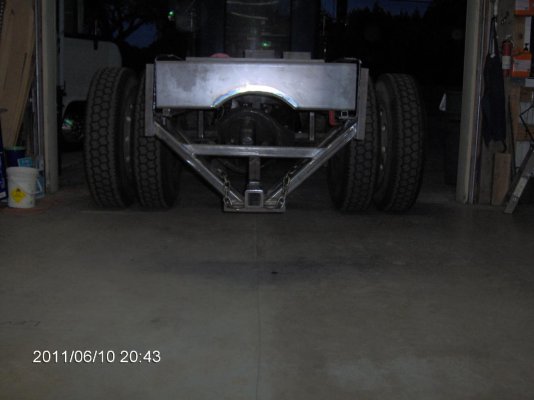
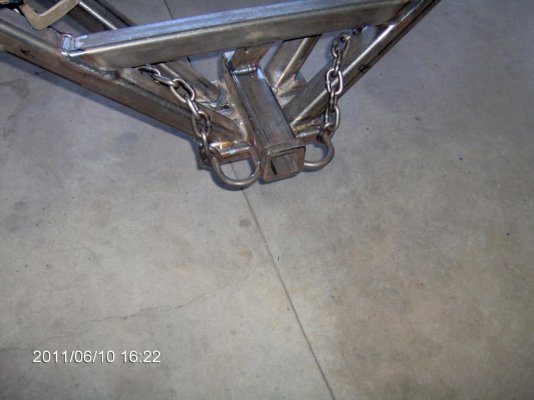
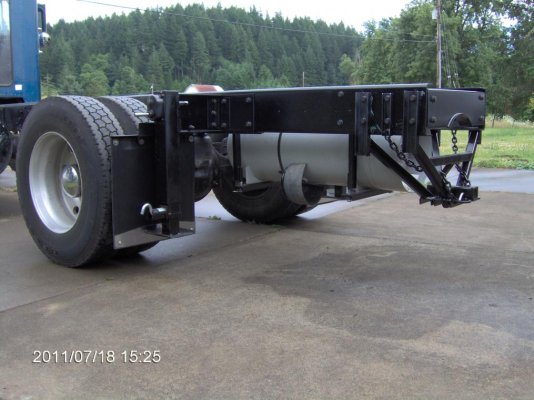
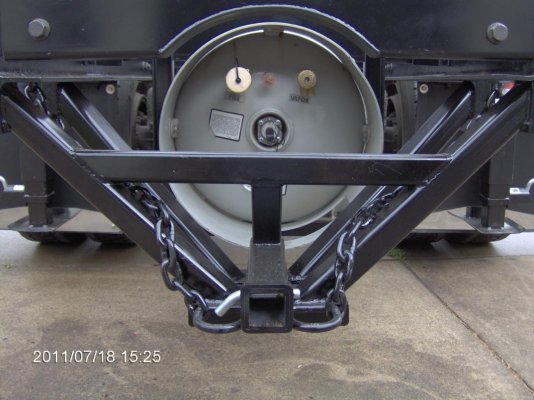
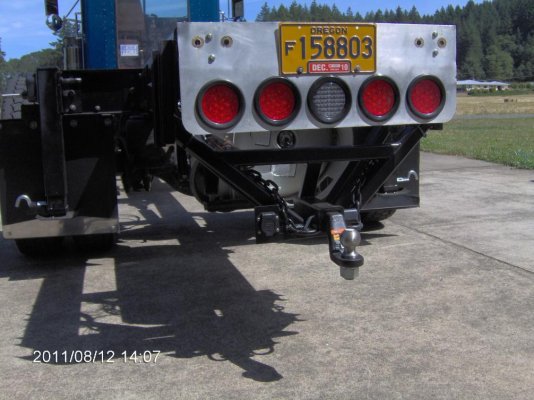
The tag on my tank shows it holds 49.8 gallons and it is 18"x54". My tank came from an auction at Country Coach, they made large diesel pushers in Oregon until they went out of business last year. I don't know how large the tanks are on trucks (pick ups)that are powered by propane. My old moterhome has a door that does not lock and it has a small propane warning label. My sisters moterhome has no lock or warning label. I plan to have a no lock door with a warning label. I also have been working on a trailer hitch that will add more protection for the tank if hit from the rear. My generator will run on propane along with the refrigerator, water heater, furnace and stove top. 170 gallons is a lot of propane. I will try to post pictures of the leveling jacks and the trailer hitch.
Attachments
mmmc101
Senior Member
Kenn,
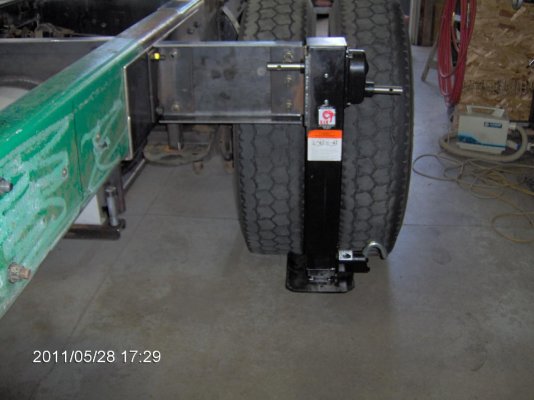
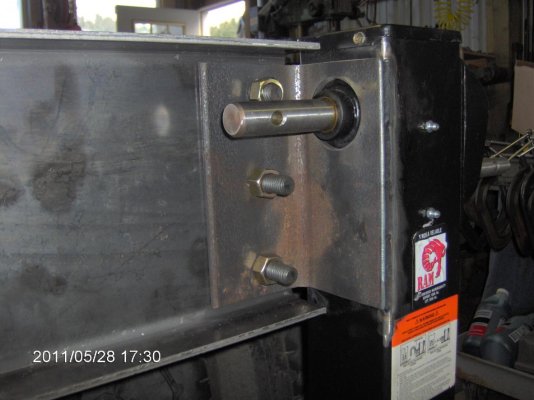
I was wondering how you were going to work the hitch around the tank. Pictures are worth a thousand words! Looks great. I would never have thought to use trailer landing gears for leveling jacks ! Great idea. Those things are simple and bullet proof. Really looks good. MMM
I was wondering how you were going to work the hitch around the tank. Pictures are worth a thousand words! Looks great. I would never have thought to use trailer landing gears for leveling jacks ! Great idea. Those things are simple and bullet proof. Really looks good. MMM
Bob86ZZ4
Senior Member
Looks cool the way you've built the hitch structure to protect the tank. Hay, blizzardND used something kind of similar to that for his jacks. He built 2" receiver hitch tubing into the four corners of his truck. Then he made up some tongue jacks to insert into each one. Then he cranks away. I like the landing gear for your truck since I'm guessing it's a bit heavier than his. Did you look into getting some hydraulic rams and building your own system on the cheap? I know a automatic self leveling type system would be expensive. But, I'd think a guy could rig up something with parts from Northern Hydraulics or Tractor Supply and do it cheaper. It sure is nice to be able to just push buttons and let the rams go down.
Hyderbound- The only propane tank size limit I am aware of is for DOT cylinders (BBQ tanks) and on an RV you can have a max of 3 cylinders with a max of 35# capacity each. That would be for the removable cylinders. A permanently mounted ASME tank like you have there, which is used for engine fuel or for the coach has no size limit that I am aware of. As long as it is permanently attached to the chassis it is exempt from any HazMat placarding. The only thing you need is for the compartment door to be labeled. I am not sure if it is a law or not, but you certainly do not want the compartment to be locked. In case of a crash, emergency personnel need to be able to access the tank to shut it off, and also if you had a gas leak in the campground you would want anyone to be able to shut off the valve. Also, if you are using propane for engine fuel, there is a black reflective diamond decal that has to go on the rear of the vehicle. Just be sure the tank you are going to use is designed for use on a vehicle, and is not a stationary tank. They do make vehicle tanks that large, but they are not common. A vehicle tank has internal automatic shutoff valves inside every tank opening. For example if you are in crash and a valve is damaged or sheared off the internal shutoff keeps the propane in the tank. Stationary tanks do not have those. Also, vehicle tanks may have both vapor and liquid withdrawal valves, or plugged openings for both. Engine fuel would use the liquid valve, coach uses like the furnace would use vapor, and most generators would also use vapor although some larger units may use liquid, refer to your generator instructions for that. The opening would be labeled liquid or vapor, and stamped into the tank below the opening. Do not mix those up, sending liquid to a vapor appliance in dangerous.
Good luck with the project.
Dave
Good luck with the project.
Dave
Kenn-TC
Senior Member
Bob the jacks are made by Ram and I paid $108 each for them at Century Wheel and Rim in Willsonville Oregon. They are rated to stabilize 12,000 and lift 10,000. They have a drop leg with return spring and 2 speeds. I think they are cheap copies of the Bulldog Jacks. I can upgrade to 20K if needed, but for the price I thought I would give them a try and so far they work fine. I did have to take them apart and rotate the drop leg 90 degrees so the pins are in line with the cranks. I have two in the front under the air cleaners and they lift the front (8,000lbs) just fine.
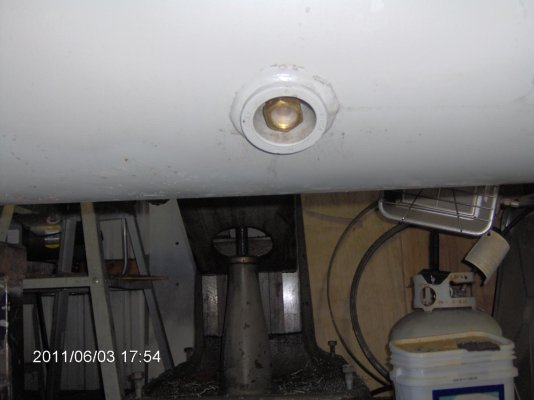
Hotrod in the picture of my tank, is that a plugged liquid opening in the bottom? If so can I make a small metal cover to keep rocks from hitting it? It is good to have someone that has LPG knowledge on this site.
90-GTSC 15 pictures so far on this thread and some of the truck in my album.
Hotrod in the picture of my tank, is that a plugged liquid opening in the bottom? If so can I make a small metal cover to keep rocks from hitting it? It is good to have someone that has LPG knowledge on this site.
90-GTSC 15 pictures so far on this thread and some of the truck in my album.
Attachments
Last edited:
kenn-
The family business was propane back in the day. Literally the first thing I drove as a little kid was a Wheel Horse with a 20# bbq tank behind the seat that it ran on, so you get the idea...
Anyway, I have been looking at the close ups of your tank, and I am not really sure what it's original application was. Not stationary, it is some sort of a vehicle tank. Not motor fuel, there is no liquid withdrawal valve or opening. It may be an RV tank, but the relief valve position is a little odd for that. Possible for some sort of equipment like a steam jenny? Either way it looks to have all the proper guards and valves for your application. The pic you showed of the valve in the bottom is the pressure relief valve, not a liquid withdrawal opening. A liquid opening would be labeled "liquid" just like your service valve is labeled "vapor". Normally on a vehicle tank it would be positioned on the end with the other valves or on top of the tank. The pressure relief valve has to go into the vapor portion of the tank (top), so the opening must have an internal tube to the top of the tank. A little unusual setup to have the relief in the bottom like that, that's why I'm wondering if it is for some sort of equipment.
First, you cannot take out the relief valve, that is definitely the most important safety feature on tank. Second, if you are planning on enclosing the tank, you will need to pipe that relief valve to the outside of the compartment. There should be an internal thread on the valve (just inside the hex) where you can tread in an adapter for a remote exit, typically a stainless flex pipe (they make them for propane relief valves specifically) hooked to a pipe to get outside. If the tank gets hot (like in a fire, or if the tank is overfilled) that relief valve vents excess pressure to keep the tank from rupturing, and it would just make matters worse to vent inside a compartment. I'm thinking it is positioned where it is to make that remote plumbing easier on what ever they designed the particular tank for. Don't try to cover it, it needs to be clear if it needs to vent excess pressure. I see it is recessed into the tank, which is not typical, and that is done specifically to protect the relief valve from damage like you describe, which should be adequate. I suppose you could fashion some sort of guard in the flight path of a rock from the tire if it worries you, just be sure to leave the opening in the valve unrestricted if it needs to open. Remember that you cannot weld directly to the tank, only on the brackets, and that should only be done on a brand new tank that has not had fuel in it, or has had the valves removed and purged with nitrogen, for the obvious safety reasons.
Not sure how you are planning on designing the rear of your truck for access to the tank for filling, but you can use a remote fill valve setup to plumb the filler and bleeder to somewhere convenient like a small filler door. Any local propane company should have or can order the valves and hoses for that, also I found the valves and mounting bracket for that at Bontrager's for $20 (without the hoses) and they may have the full setup for cheap as well. Just thinking...
Nice job on the sturdy looking brackets and cradle for the tank.
Dave
Kenn-TC
Senior Member
Hot rod, thanks for the info on the valve. This is the first one I have seen with the pressure relife valve in the bottom. My tank was built by manchester and it was built as a motor home tank for Country Coach in Oregon. I looked on their web site and they had a drawing showing the valve on the bottom with an internal tube going to the top into the vapor space as you said. I might make some type of guard to protect from rocks and I will mount it without welding and make sure it can't prevent the flow. My tank will not be in a compartment so it should work as is. My plan is to fill it through a door above the trailer hitch. I built the last cross member with a cutout so the LPG person can reach the valve. When I built the hitch I considered your idea you gave to Ran D about the safety chain loops. I installed a chain that goes from the safety loop to the frame of the truck. If the trailer hitch failed the chains will have a chance of saving the hole mess.
Attachments
Kenn-TC
Senior Member
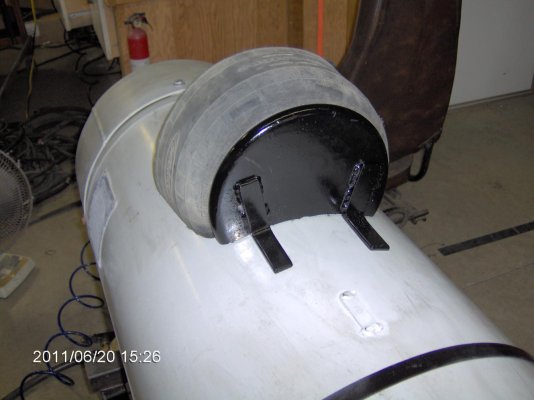
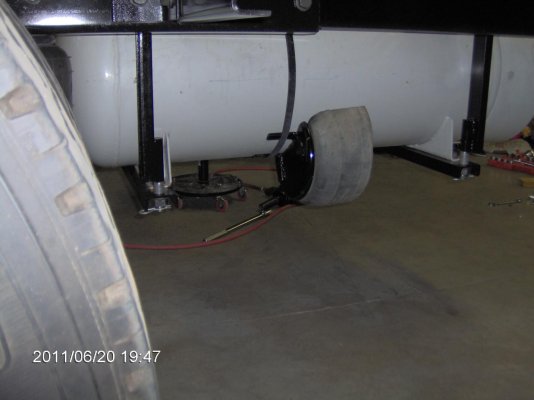
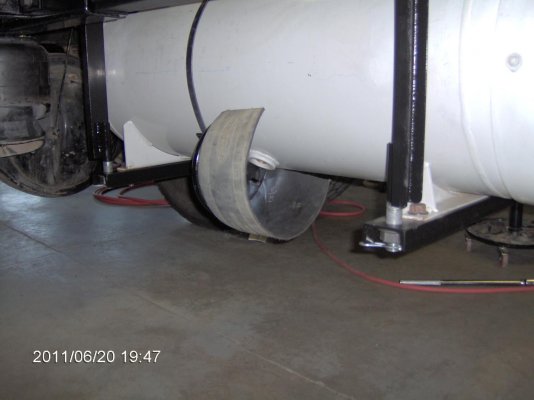
Hot Rod I got all the parts painted and installed on the truck. I used an old air spring to make a rock guard and mounted it with a strap. After having the hitch and the tank back on the truck I think the tank can be filled from the back. I am now replacing air lines and hope to have the truck running soon. Thanks again for your advice. Kenn
Attachments
Now that has to take the official award for the most creative use of a part that anyone else would have thrown away! I would have never figure out it was an airbag if you had not told me. Plenty of room for escaping gas (which will most likely never happen anyway), and very good that you did not weld directly to the tank. Probably overkill, but you really can't be too safe with the stuff. 99.99% of people that use propane will never have a hint of a problem, but that last .01 can be big. You've got great attention to detail on everything you build. I like the safety wired nuts on the brackets. Stuff most people would never think of, but when you get that rig done it will be bullet proof and trouble free. Nothing worse than spending your valuable time off on the road trying to fix all the little things you did not think of.
Good luck. Dave
Good luck. Dave
Kenn-TC
Senior Member
air system
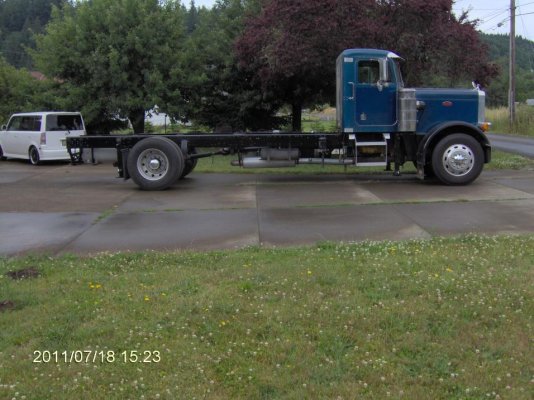
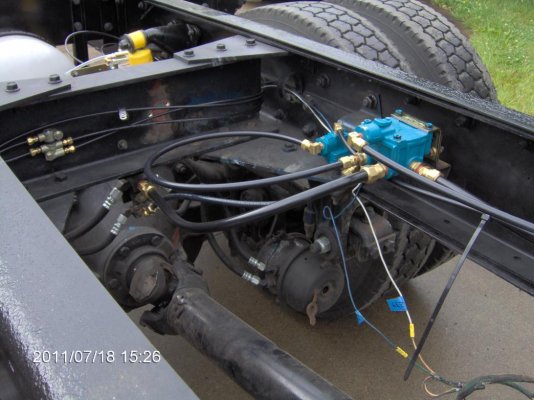
Well it took three weeks but I have the air system finished. I also replaced all of the water hoses and belts. As a bonus I had to put a new A/C compressor and dryer on. I still need to have it charged. I think I will get another trip permit and drive it on the road and make sure all is well. I will put temporary lights on the back for the test drive and I plan to tow the race trailer. I might install an electric brake controler before the test. If all checks out ok on the test drive, I will start prepping for painting the cab.
Well it took three weeks but I have the air system finished. I also replaced all of the water hoses and belts. As a bonus I had to put a new A/C compressor and dryer on. I still need to have it charged. I think I will get another trip permit and drive it on the road and make sure all is well. I will put temporary lights on the back for the test drive and I plan to tow the race trailer. I might install an electric brake controler before the test. If all checks out ok on the test drive, I will start prepping for painting the cab.
Attachments
Bob86ZZ4
Senior Member
Wow, does that ever look nice. Great work. I love your hitch. My truck I finally found the fitting near the back that would be the air supply for a trailer and there was nothing hooked up to it. So I put a piece of air line tubing on it with a quick disconnect on the other end and I can then hook my air compressor hose to that. That way I can use the truck's air system to air up tires and such if needed. Works great so far. I normally leave the red knob out so there's no air in that line, just push it in to pressurize it.
I know the law would require you to have brakes on the trailer. I have a electronic brake controller for our enclosed trailer. But, the brakes on my truck are so good I keep my controller set pretty low so it hardly applies much trailer brake. If it was me and I just wanted to give it a bit of a test drive I wouldn't bother hooking up the brake controller. I would for sure make sure the break-away was hooked up tho.
I know the law would require you to have brakes on the trailer. I have a electronic brake controller for our enclosed trailer. But, the brakes on my truck are so good I keep my controller set pretty low so it hardly applies much trailer brake. If it was me and I just wanted to give it a bit of a test drive I wouldn't bother hooking up the brake controller. I would for sure make sure the break-away was hooked up tho.
Kenn-TC
Senior Member
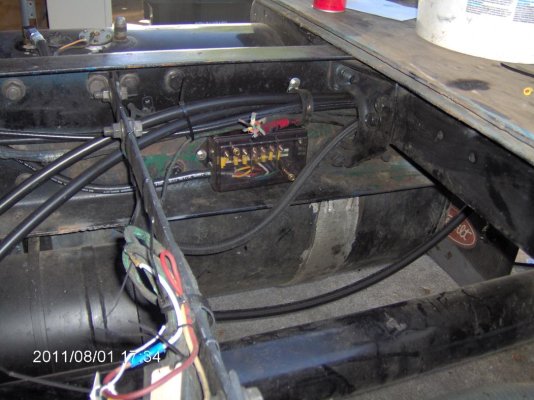
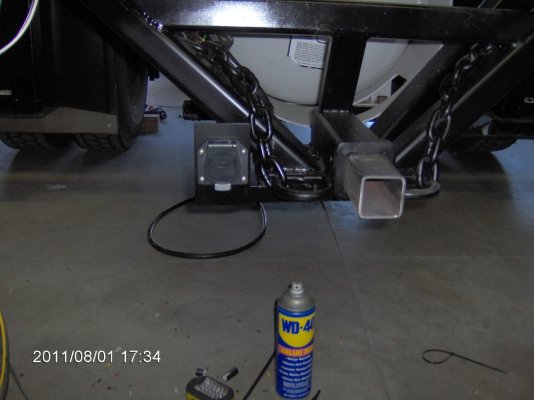
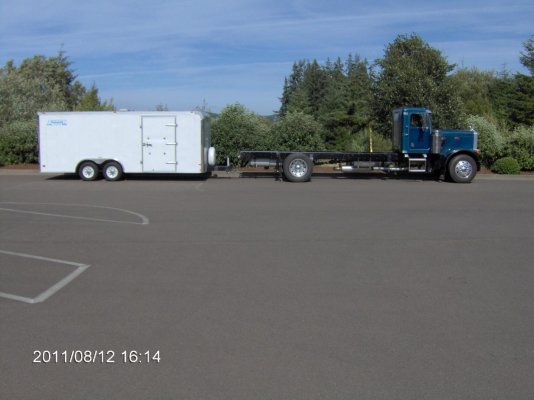
Yesterday I towed the race trailer (6500lbs) with the Peterbilt and everything went fine. I changed the truck wiring to match up with an RV plug. I put in a new 7 conductor cable from the firewall of the truck to a junction box mounted inside the left side frame rail in an area just behind the cab that I should have access to when the motor home is done. I then ran a cable to another junction box at the rear of the truck and then to the trailer hitch mounted plug. I wired the 12v line (black) to a breaker that is hot when ever the truck batteries are on. Now if I stop at a rest stop and shut off the truck eng I can have the trailer interior lights work. I also installed the elect brake controler in the cab and it works.
I parked the truck and trailer on a level spot and was pleased to see it looks level. The truck ran great and was not challanged at all. Overkill for sure. I think when the motor home is done it may make the truck work a bit more. My overall plan has changed some. I think I will build the floor framing and the compartments before I paint the cab. I will then remove the hole thing for finish welding and painting. I will try to upload more pictures as the work goes on.
I parked the truck and trailer on a level spot and was pleased to see it looks level. The truck ran great and was not challanged at all. Overkill for sure. I think when the motor home is done it may make the truck work a bit more. My overall plan has changed some. I think I will build the floor framing and the compartments before I paint the cab. I will then remove the hole thing for finish welding and painting. I will try to upload more pictures as the work goes on.
Attachments
You do nice work. Had you thought about building the trailer hitch so it can slide up and down? Raising and lowering the trailer tongue. I presume with the spec racer you have don't have much ground clearance, hence its helpful to raise the front of the trailer for loading and unloading. I have the same problem with my Cup car. I've seen adjustable HD hitches that slide up and down with two large pins to secure it traveling. I've thought about putting air bags behind a hitch like that to raise and lower the tongue (after pulling the locking pins) when I need to load and unload the car. There is a picture of a hitch like that someone on this site posted (without the airbags for raising and lowering).
My dream is Pete 379 or 389. I wish I had the fab skills and creatively that the guys on this site have.
Keep the pictures coming.
My dream is Pete 379 or 389. I wish I had the fab skills and creatively that the guys on this site have.
Keep the pictures coming.
Similar threads
Try RV LIFE Pro Free for 7 Days
- New Ad-Free experience on this RV LIFE Community.
- Plan the best RV Safe travel with RV LIFE Trip Wizard.
- Navigate with our RV Safe GPS mobile app.
- and much more...


