Journey with Confidence RV GPS App RV Trip Planner RV LIFE Campground Reviews RV Maintenance Take a Speed Test Free 7 Day Trial ×

Go Back   Truck Conversion & Toterhome Community > Truck Conversion Talk > Building Your Own
Click Here to Login
Register FAQ Community Calendar Today's Posts Log in

Join Truck Conversion Today
Reply
 
LinkBack Thread Tools Search this Thread Display Modes
 
Old 07-22-2019, 08:51 PM   #81
Senior Member
 
Join Date: Feb 2019
Location: void
Posts: 156
Default

I need to be able to rely on it no doubt. My biggest concern is the ability to heat and cool it. This place is going to be my sanctuary!

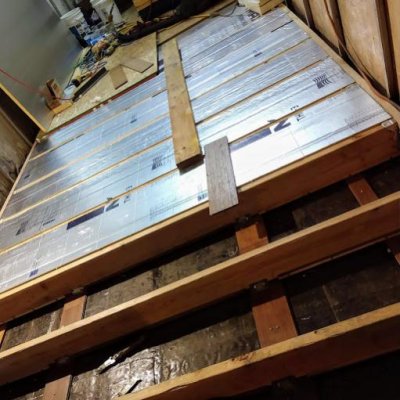
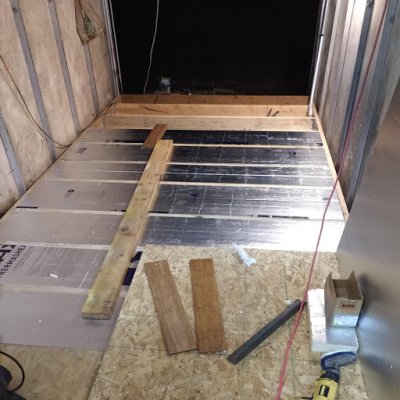
So tonight I resume filling in the rigid insulation under the floor. 8 bays left, then 3 sheets of sub floor, then frame the back wall, then remove the roll up by August one, to meet my goal.......... More photos soon!
__________________

hoodoo valley is offline   Reply With Quote
Old 07-23-2019, 02:36 AM   #82
Senior Member
 
Join Date: Feb 2019
Location: void
Posts: 156
Default

And here they are! 3 bays left. I'll be picking up the subfloor and glue tomorrow. Already have the screws.
Attached Thumbnails
jtk.jpg   yjq4.jpg  
__________________

hoodoo valley is offline   Reply With Quote
Old 07-23-2019, 11:00 PM   #83
Senior Member
 
samcrimm's Avatar
 
Join Date: Sep 2015
Location: Tullahoma
Posts: 361
Default

looking great! i don't see the plumbing yet?
__________________
2005 Renegade #1204 42 footer Columbia M3200CH-435,12 speed auto Cat 12 kw Genset, Roadtrip Mission in-mot Dish Network, Washer dryer combo, Jeep Liberty toad,1973 Cessna Skylane,1955 Chev 210 Belair survivor
samcrimm is offline   Reply With Quote
Old 07-24-2019, 10:38 AM   #84
Senior Member
 
Join Date: Feb 2019
Location: void
Posts: 156
Default

Thank you Sam! Plumbing is going to be entirely to the inside of the insulation, and accessible. Basically it's going to run along the outside of an interior wall, and be covered by a chase / base board that is easily removable. It's been minus 35 degrees here before, and so I don't want any freezing at all, and I want to be able to access the plumbing should the need arise. Additionally, the kitchen sink and the shower / toilet are going to be right next to the other for simplicity in the plumbing loop.
hoodoo valley is offline   Reply With Quote
Old 07-27-2019, 03:23 AM   #85
Senior Member
 
Join Date: Feb 2019
Location: void
Posts: 156
Default

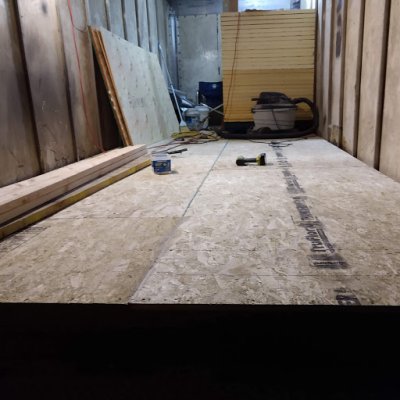
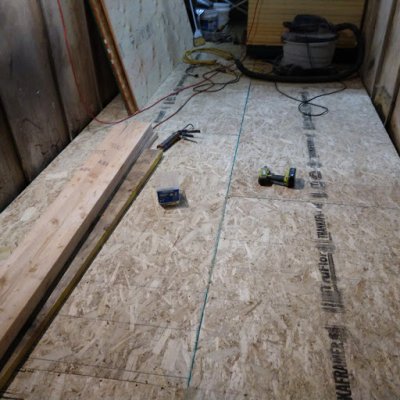
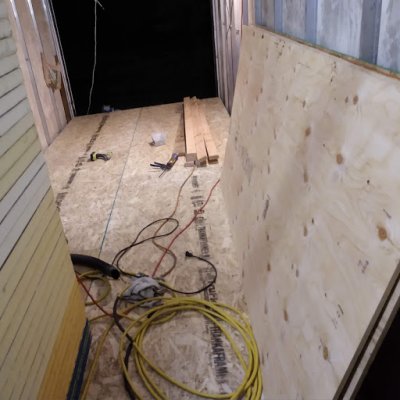
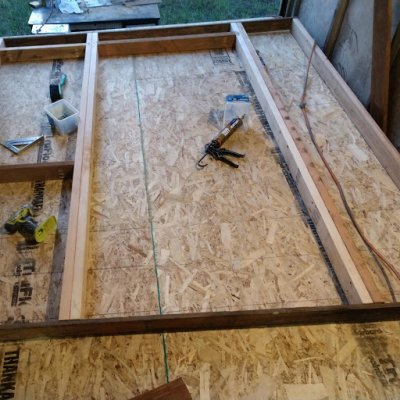
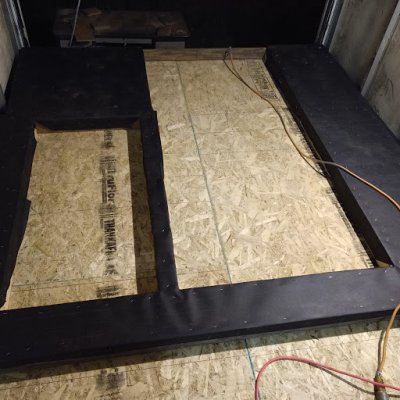
I took a few days off, but Friday night, I finished the floor insulation and sub floor sheeting. Photos coming soon. My next move is to frame up the rear wall, rip out the roll up, and tip that wall, which will have a 3-0 full light man door.
hoodoo valley is offline   Reply With Quote
Old 07-28-2019, 02:10 AM   #86
Senior Member
 
Join Date: Feb 2019
Location: void
Posts: 156
Default

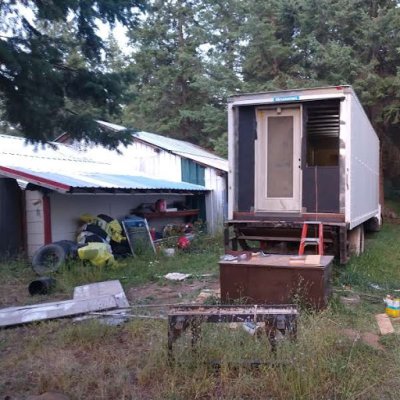
Start building the rearward wall tomorrow. In the meantime....Photos of the progress thus far......
Attached Thumbnails
mailservice5yhhy.jpg   mailservicethh3.jpg   tjhjky6s65o767y6l57ksok.jpg  
hoodoo valley is offline   Reply With Quote
Old 07-29-2019, 02:49 AM   #87
Senior Member
 
Join Date: Feb 2019
Location: void
Posts: 156
Default

Cut the parts for the rear wall, and scoped out what was in the way of removing the roll up. Looks fairly straight forward, though the grinder and cut off wheels will be on site just in case. I start assembly tomorrow.
hoodoo valley is offline   Reply With Quote
Old 07-31-2019, 10:11 PM   #88
Senior Member
 
Join Date: Feb 2019
Location: void
Posts: 156
Default

Wall framed and sheeted. Laying on the floor. I'll wait until this weekend before I drop the roll up. I'll need a full day for this, because I need to install the man door and be sure nothing can get in the truck before I go walking away from it. Photos coming!
hoodoo valley is offline   Reply With Quote
Old 08-01-2019, 01:51 AM   #89
Senior Member
 
Join Date: Feb 2019
Location: void
Posts: 156
Default

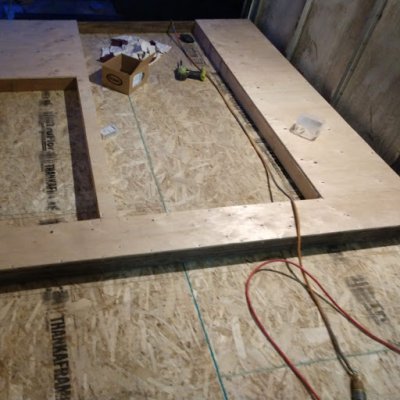
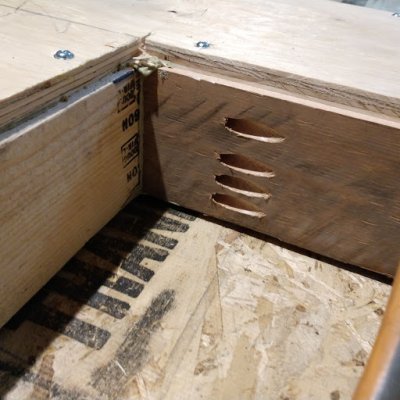
I used plywood for the rear wall, and glued and screwed the sheeting with cabinet screws, so it's really solid. Employed elements of "green" framing in that there's no conventional headers and minimal framing. Top and bottom plates are 1X4. All framing is glued and screwed with torx screws. Pocket screw jig was employed for the header connections. Didn't have any house wrap or tyvek so we utilized some good old fashioned 15 pound felt for the vapor barrier.


Now the photos!
Attached Thumbnails
uyte.jpg   yui.jpg   y34.jpg   7676.jpg  
hoodoo valley is offline   Reply With Quote
Old 08-01-2019, 10:05 PM   #90
Senior Member
 
samcrimm's Avatar
 
Join Date: Sep 2015
Location: Tullahoma
Posts: 361
Default

Love the kreg set for joints, you moving a long great.
__________________
2005 Renegade #1204 42 footer Columbia M3200CH-435,12 speed auto Cat 12 kw Genset, Roadtrip Mission in-mot Dish Network, Washer dryer combo, Jeep Liberty toad,1973 Cessna Skylane,1955 Chev 210 Belair survivor
samcrimm is offline   Reply With Quote
Old 08-03-2019, 10:00 PM   #91
Member
 
Join Date: Mar 2017
Location: Galion
Posts: 57
Default

Sorry if I missed it....

Where are you located at? -35 can be pretty cold and I am curious how the non freezing plan will work out.....I can’t even get the pipes in my house to stop freezing every winter.

Pics are always great. When is the expected completion date?
Ttnj is offline   Reply With Quote
Old 08-04-2019, 12:33 AM   #92
Senior Member
 
Join Date: Feb 2019
Location: void
Posts: 156
Default

It hasn't been that cold in awhile. I think all the Californians moving up here has contributed to warming trends in the winters....

Anyhow, I live in Priest River, Idaho. At this point, we typically get our first snow fall a day or two before or after Halloween, and my goal is to have heat in the living space by then so I can work on the inside during the Winter months.
hoodoo valley is offline   Reply With Quote
Old 08-04-2019, 01:43 AM   #93
Senior Member
 
Weldman's Avatar
 
Join Date: Jun 2019
Location: MC
Posts: 119
Default

Quote:
Originally Posted by hoodoo valley View Post
It hasn't been that cold in awhile. I think all the Californians moving up here has contributed to warming trends in the winters....

Anyhow, I live in Priest River, Idaho. At this point, we typically get our first snow fall a day or two before or after Halloween, and my goal is to have heat in the living space by then so I can work on the inside during the Winter months.
Just stick a Mr Heater in there with 5 gallon propane tank and it will warm right up with 9k btu on high.
Weldman is offline   Reply With Quote
Old 08-04-2019, 10:32 AM   #94
Senior Member
 
Join Date: Feb 2019
Location: void
Posts: 156
Default

My only concerns about that would be the tightness with respect to air infiltration, and the Co2 as well as the moisture. I'll likely put in a cadet wall heater for the times when I'm on shore power, but I REALLY want one of those diesel heaters.
hoodoo valley is offline   Reply With Quote
Old 08-06-2019, 01:28 AM   #95
Senior Member
 
Join Date: Feb 2019
Location: void
Posts: 156
Default

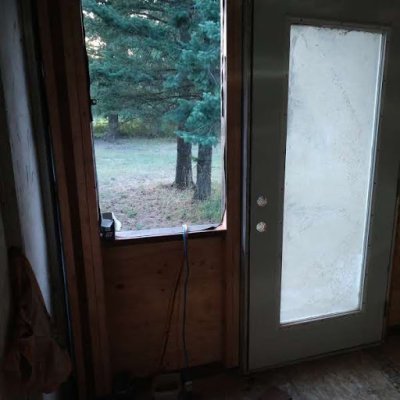
Roll up door is gone. Lots of time with a cold chis breaking spot welds on the track, but the whole affair is in a pile on the ground. Put up my shed roof flashing and tipped the wall in to place. Full light man door is in place now. 2-0 X 4-0 single hung window has been ordered. Not tempered glass though. Couldn't afford it right now.
hoodoo valley is offline   Reply With Quote
Old 08-06-2019, 01:57 AM   #96
Senior Member
 
Weldman's Avatar
 
Join Date: Jun 2019
Location: MC
Posts: 119
Default

I have one of those cheap Chinese diesel heaters though not yet installed future endeavor. Did you get dual paned window at least with argon fill?
Weldman is offline   Reply With Quote
Old 08-10-2019, 05:07 PM   #97
Senior Member
 
Join Date: Feb 2019
Location: void
Posts: 156
Default

I did! The man door is just a regular household man door with glass. It's a Stanley, fully insulated. I'm on hold on the single hung window, but my studs for the walls have already been cut and awaiting insulation hold strippage. I rip those tonight and start putting them on the studs.
hoodoo valley is offline   Reply With Quote
Old 08-17-2019, 03:10 AM   #98
Senior Member
 
Join Date: Feb 2019
Location: void
Posts: 156
Default

..............Photos!
Attached Thumbnails
;kmnl'.jpg   75io57io.jpg  
hoodoo valley is offline   Reply With Quote
Old 08-17-2019, 11:30 AM   #99
Senior Member
 
Join Date: Feb 2019
Location: void
Posts: 156
Default

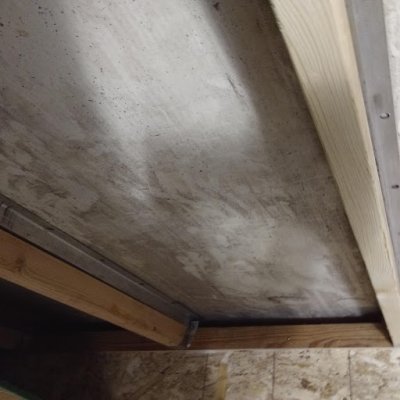
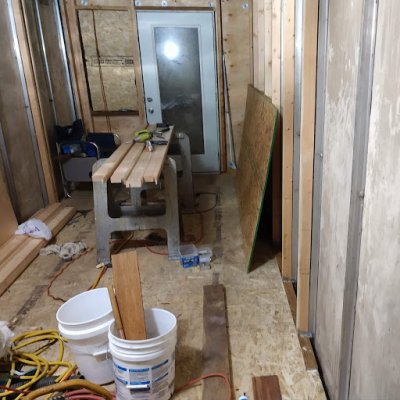
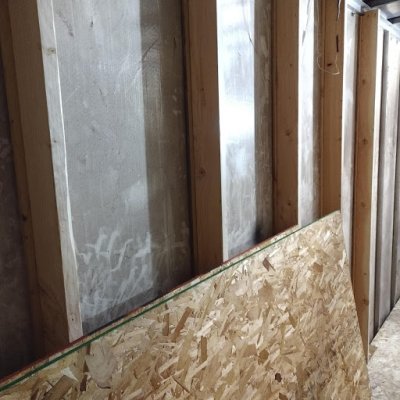
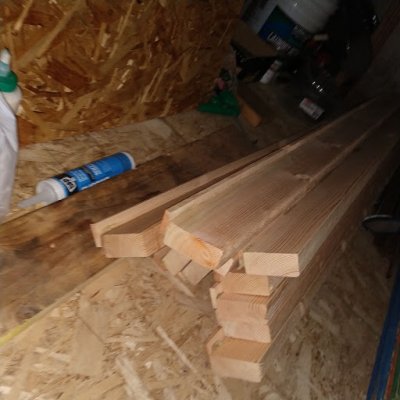
Showing the notched studs and hangers at bottom. Note the stops to keep the rigid insulation off the box wall for exterior space venting. The stops also allow additional seal with the silicone sealant. There will be a 1x3 top plate to keep the tops of the studs in check as far as layout. These will be attached with pocket jigged screws.
Attached Thumbnails
p9i7t7o7.jpg   68eo86e.jpg   o;t7ppr.jpg   io67io5o.jpg  
hoodoo valley is offline   Reply With Quote
Old 08-17-2019, 12:15 PM   #100
Senior Member
 
Weldman's Avatar
 
Join Date: Jun 2019
Location: MC
Posts: 119
Default

Slowly but surely it’s coming together, one piece at a time. I haven’t had time to do anything with mine plus I broke my hand...
Going with polystyrene insulation behind the interior walls?
__________________

Weldman is offline   Reply With Quote
Reply


Posting Rules
You may not post new threads
You may not post replies
You may not post attachments
You may not edit your posts

BB code is On
Smilies are On
[IMG] code is On
HTML code is Off
Trackbacks are On
Pingbacks are On
Refbacks are On


Powered by vBadvanced CMPS v3.2.3

All times are GMT -5. The time now is 02:06 AM.


Powered by vBulletin® Version 3.8.8 Beta 1
Copyright ©2000 - 2024, vBulletin Solutions, Inc.
×