My 17' Uhaul Toy Hauler

bmzero

Advanced Member
Joined
Jun 2, 2013
Messages
46
Location
Birmingham, AL
I race UTV's. That's not a confession, because I am not in remission yet. This is an ongoing disease that I have suffered from for nearly 20 years now. All of this time has not been on UTV's. Actively racing dirt bikes and quads has also plagued me for many years.

I have gone through all sorts of vehicle setups to transport equipment and people to and from these events.

Currently, I race out of a 48' Haulmark race trailer. This is the largest of my contraptions. However, it has finally pushed me over the edge. It's literally like driving a semi down the road. Hard to park. Hard to drive, and killing my F450.

31624_10151364308274809_657484418_n.jpg


I have been thinking about this conversion project for quite a while now. I have bounced back and forth between the 24' trucks and the 17' trucks. The few 24' trucks I have driven just didn't have the road manors for which I was looking.

The Truck

The local Uhaul "clearance" yard had a few retired 17' trucks come in for sale a few weeks ago. I got the pick of the litter, all Arizona trucks. After driving it, I knew I found the one. It's a 1998 E350 with the 17' box. Mechanically, near perfect. No rust. Just south of 200k miles. The box is very sound with only a few superficial dings in the upper corners, for which I already purchased replacement corners.

8932328792_b1a4d235af_b.jpg


The Plans

The vehicles I race range from 9' to 12' depending on the vehicle, which takes up most of the 14' floor in the truck. This is the reason I went with the Uhaul - the "Granny's Attic". That's where the "loft" will be built, containing the twin bed. The loft will be walled off from the remainder of the box, with a sliding door to get into the bunk.

There will be a 13,500BTU roof air and a side entry RV door.

I have purchased a Champion 3100w inverter for the AC power. Seen below next to my 2000 Champion. I am a big fan of both of these units.
8853451609_ac9f1e9f28_b.jpg


The primary purpose of this vehicle is a race transporter, with a secondary goal of providing a place for me to sleep. I usually go to the races by myself, as my family is not really into racing. However, soon, my son will be making the trips with me. He's four, so still some growing to do.

Most of the fabrication on this truck will take place below the box. I need to incorporate the following:
  • Custom generator drawer
  • Large side boxes
  • Mount air compressor
  • Fresh water tank with external shower and pressure washer hookup
  • Two large deep cycle batteries
  • Secondary fuel tank for the toys

The only amenities on the inside of the box will be the bunk, sink, microwave, and AC/DC cooler/freezer.
 
The Build

I purchased the 56" toolbox from Harbor Freight to serve as the main box for all things racing related.

8931715623_47bc6db0ba_b.jpg


Here you can see the box positioned in the truck alongside the aluminum storage rack I built which holds six Rubbermaid storage bins. You can never have too much storage for racing. The storage rack is bolted to the truck, using existing mounting brackets for the rub rails. It removes easily so I can get the toolbox out.

8931719119_b9a945fafe_b.jpg


Here you can see the first test-fit of the longer vehicle. There are about 6" between the front bumper and the toolbox.

8931795313_4c227a822e_b.jpg


Here is the smaller of the race cars inside the truck.

8931716419_26ca775e85_b.jpg
 
Here is the setup I took to last weekend's race.

8931713845_399170faed_b.jpg


Next mods are the roof A/C and side entry door.

Then, I need to find a proper AC/DC cooler/freezer. I'm currently debating the ARB cooler (ARB Portable Fridge Freezers | ARB 4x4 Accessories) and the EdgeStar (EdgeStar 12V DC Portable Fridge / Freezer - 43 Qt. - FP430). Both have the AC/DC switching, so no benefit there to either one. If you have any experience with either of these coolers, please let me know.

Also, if you have any words of wisdom about this build, I would be very appreciative to hear them.
 
It looks to me like with your existing shelf and tool box, with the UTV loaded, the only space you have left is the attic. Put your bunk there and you will have to cross everything else off of your list. I would suggest putting the generator compartment, compressor, batteries (sealed compartment) and storage shelf up there, and make your bunks fold downs that can come down after you unload the utv. Other wise you are already flat out of floor space. No where else to put the generator compartment that won't intrude into the same space where you park, except possibly where your storage shelf is now.

Any chance you can construct shelving for the bins along the top of the walls so that the utv can drive under/alongside the shelves? I did the entire shelving in my vending trailer that way to keep the entire floor space clear for rolling units to strap along the walls.
 
It looks to me like with your existing shelf and tool box, with the UTV loaded, the only space you have left is the attic. Put your bunk there and you will have to cross everything else off of your list.

Everything on the bulleted list above will live below the box, attached to the frame rails of the truck. The only things that will be changed on the inside are a sink, the cooler/freezer area, and some more cabinets attached to the bunk wall.
 
Another factor in my decision to use "Granny's Attic" as the loft is because I do a lot of overnight (ie. multi-day) driving trips. With the bunk built permanently inside of the loft area, I always have a place to sleep, even with the box loaded. If I had the bunks built into the walls, I would have to unload the box (in a WalMart parking lot) to fold down the beds before hitting the sack.
 
We stay at "Camp Wal-Mart" on the way to events as well, so I can understand that. I'm just finishing up my toter project, and I planned on a lot of things below floor level, like the generator slide out, and I was amazed how little room there was to work with underneath. And mine is a bigger chassis with more ground clearance (i.e. room to build boxes). There was no way to put the generator slide underneath on mine. By the time you allowed room for the structural tubing to build the boxes, the aluminum door trim intruding into the opening, and the clearance needed for the slide itself to roll out and clear the same stuff, there was not enough room left for a the height of my generator. It all looked good in theory until we sat down and mocked up the drawer etc. and there just wasn't room. On my truck there is 24" from the bottom of the floor/side rail to the bottom of the tool box structure, at a point where I was comfortable with ground clearance for the truck. Your truck appears to be lower than mine. Not trying to stick pins in your balloon, just saying that did not work out so good for me. Even finding place for a decent sized air tank for the compressor was a pain, than ended up underneath the passenger side step.

Here's some pics:
first shot, just the framing for the floor. looks like lots of room below.
second shot, tool boxes framed in with square tubing, less room
third shot, with sheet metal, looking even smaller
with doors installed, way less room than I had hoped, and not enough vertical space for a generator on a slide.

Good luck with your project!
 

Attachments

  • IMG_0258[1].jpg
    IMG_0258[1].jpg
    99.6 KB · Views: 38
  • IMG_0817[1].jpg
    IMG_0817[1].jpg
    100.2 KB · Views: 34
  • IMG_0818[1].jpg
    IMG_0818[1].jpg
    100.2 KB · Views: 36
  • IMG_0821[1].jpg
    IMG_0821[1].jpg
    110.5 KB · Views: 46
Here's some pics:

Hot Rod, that's a very cool build, and looks like you pulled it off very well.

My only concern with putting things under the box is the generator itself. It's only 18" tall, including the handles, so it's smaller than most. By the time I get the 19.5" wheels (and taller tires) installed, I think there will be plenty of room. I can save about two inches by removing the handles if necessary.

I already have my compressor and tank mounted. It's a fairly compact setup, but works well for me. The other things that will go under there will be mostly custom fabricated (fuel tank, water tank(s), etc.).

Thanks for the information.
 
I purchased my side door yesterday. Amazon has these things listed with free shipping. Most retailers are charging around $150 for shipping.

61QIs6KwRxL._SL1000_.jpg


AP Products 015-307211 Off White RV Entrance Door : Amazon.com : Automotive

I'm leaning toward the Advent 13,500 roof air. A good friend of mine owns a trailer sales business and he said he has sold almost 50 of them with zero returns. No shipping if I pick it up from him.

Anyone here have feedback on the Advent roof airs?
 
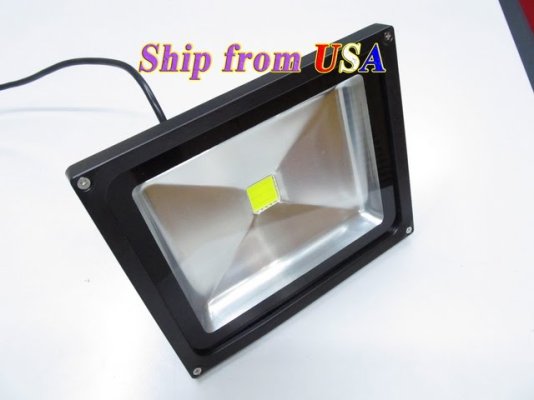
I bought four 12V 30W flood lights for exterior lighting. I started off by buying one of these lights, which can be seen on the back of the truck in one of the photos above, near the roof. I bought one to make sure they weren't a waste of money. A single light is probably enough light for my needs, so two should be substantially better.

The truck will get two lights facing the rear and two on the passenger side wall, facing outward.

The big key here is that they're DC lights. That way, I won't have to run the generator every time I want to turn the lights on outside.

12V 24V Truck Fish Boat 30W Cool White LED Wall Pack Wash Flood Garden Light | eBay
 

Attachments

  • 30x1A.JPG
    30x1A.JPG
    33.8 KB · Views: 6
I used a Carrier 15000 btu heat pump instead of traditional a/c unit. The theory being with the heat pump you get the full 15000 btu for heat as well as a/c, instead of the useless heat strip you get with a normal a/c unit. So it kills 2 birds with one stone. Which works quite well, very happy with it. The only issue I have is that a 3000w generator is rated for a 13500 btu a/c unit, and my 3000 honda will just barely run the 15000 btu heat pump. In fact it does occasionally trip the overload on the generator when the compressor restarts on a hot day after cycling off. It will run it all day as long as the compressor keeps running. I see you have a 3100w generator, so you would probably be in the same boat. Other than that I would recommend the heat pump instead. Unless you are plugged in more often than not.
 
Have any nite photos of the lights on?I looked at those and not sure if they are bright enough for my needs.

When the seller got ready to ship the 30W lights, I guess they realized that their supplier was out of stock. I tried two different sellers with no luck. They were probably getting them from the same supplier.

I ended up going with 50W lights instead. The single 30W light I got was definitely sufficient for most things, but with racing, we need a lot of light. Two 50W lights should be way more than enough.

4X 50W Cool White LED Floodlight Waterproof IP67 50Watt 12V DC Lamp Black Shell | eBay

I'll try to get some photos after I get them installed, but honestly, night photos are pretty useless for judging light output. It's 100% relative to the shutter speed of the camera. I can make them look as bright as the sun by just leaving the shutter open longer. I'll post up some anyway when the time comes.
 
I was able to get a little work done this weekend since the wife and kids are out of town. :D

Battery tray - will live on the inside of the frame rails, under the box. It'll be safe and out of the way of most road debris. I will have a 24V circuit for the exterior lights and the ARB cooler/freezer and a 12V circuit for everything else (interior lights, race radios, etc.).

9006715503_0161e74267_b.jpg


9006716301_a34cd3623c_b.jpg
 
I was also able to get the roof A/C installed. Man, I underestimated how hard it would be, emotionally, to cut a hole in the roof. Everything in my person says that cutting a hole in the roof is a bad idea, but then I realize that it's about 110 degrees in the Southeast in the summer. That overrides my fear of leaks.

9007898762_c66b21d832_b.jpg


9006718107_a2bac6a21e_b.jpg
 
Cool build.

I have one of the bigger, old U-Hauls like Bydesign, but I haven't gotten to modifying the box yet.

Keep up the good work.
 
When the seller got ready to ship the 30W lights, I guess they realized that their supplier was out of stock. I tried two different sellers with no luck. They were probably getting them from the same supplier.

I ended up going with 50W lights instead. The single 30W light I got was definitely sufficient for most things, but with racing, we need a lot of light. Two 50W lights should be way more than enough.

4X 50W Cool White LED Floodlight Waterproof IP67 50Watt 12V DC Lamp Black Shell | eBay

I'll try to get some photos after I get them installed, but honestly, night photos are pretty useless for judging light output. It's 100% relative to the shutter speed of the camera. I can make them look as bright as the sun by just leaving the shutter open longer. I'll post up some anyway when the time comes.
What I really want to see is how much area or side of truck one or two lights up.I have some signage I want to light up is why I'm asking.
 
What I really want to see is how much area or side of truck one or two lights up.I have some signage I want to light up is why I'm asking.

What I explained earlier still holds true. I'll send you a couple of photos after they lights are installed that will illustrate my point. I'm glad to send the photos, but you shouldn't judge your purchase on them one way or the other due to the way shutter speed affects light application at night.
 

Try RV LIFE Pro Free for 7 Days

  • New Ad-Free experience on this RV LIFE Community.
  • Plan the best RV Safe travel with RV LIFE Trip Wizard.
  • Navigate with our RV Safe GPS mobile app.
  • and much more...
Try RV LIFE Pro Today
Back
Top