Journey with Confidence RV GPS App RV Trip Planner RV LIFE Campground Reviews RV Maintenance Take a Speed Test Free 7 Day Trial ×

Go Back   Truck Conversion & Toterhome Community > Truck Conversion Talk > Building Your Own
Click Here to Login
Register FAQ Community Calendar Today's Posts Log in

Join Truck Conversion Today
Reply
 
LinkBack Thread Tools Search this Thread Display Modes
 
Old 01-04-2015, 11:06 PM   #1
Junior Member
 
Join Date: Nov 2014
Location: benton city
Posts: 3
Default 98 int. 8100 toterhome frp box build

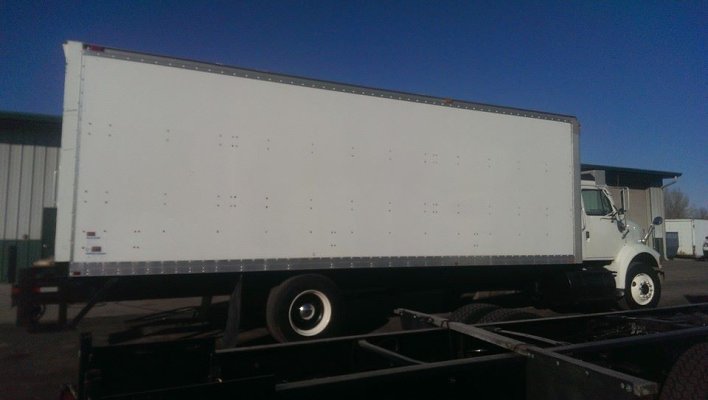
So my brother and i own a karting business and wanted something a little bigger to tow our 50' trailer than my 06 dodge megacab 5.9 automatic. So we went on a hunt and found a gem in Minocqua, WI (98 international 8100 with a m11 cummins and 10sp rockwell ) with minimal amount of miles.. cab and chassis only. It seemed perfect for our build with a 268" wheel base. On our way back we stopped and purchased a 26' frp box in awesome condition.

The idea is to cut and convert the box to make an overhang bed and 13' 8" living area. So after we got to measuring we figured out that we would be playing with fire on the max tow length in washington and will be over in California so we are in the process of getting a 40' trailer..

So with all that said i look to all of you who have taken on such a project for advice in multiple things. How did you go about things and what would you do different. Also where did you get trim to match everything..

We plan to build an internal frame for wiring and insulation ( expanding urathane foam)

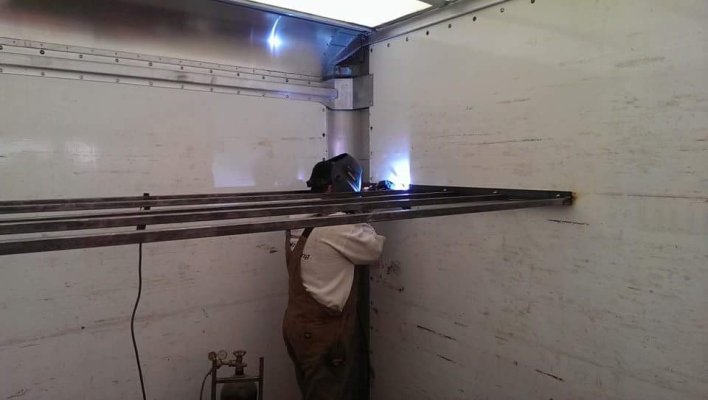
Before we cut the box we plan to build a steel frame out of 1"x1" .095 with 1x2.5 flange to attach to the frp with fasteners. When we do this i am concerned about having the right kind of trim to detail it out..

any advice is appreciated..
Attached Thumbnails
truck picture.jpg  
__________________

chris.pdp is offline   Reply With Quote
Old 01-05-2015, 06:57 PM   #2
Senior Member
 
Join Date: Jan 2011
Posts: 527
Default

I was scheming on a similar project. Then I decided it would be easier to find a "furniture mover" type box that already had the attic built in. Then decided to downsize and build our own smaller box from scratch anyway. But, I did a lot of thinking on just the project you are working on.

My plan was to build an internal framework of 1.5x1.5 steel tubing in the front portion of the box to support the cab overhang and new front wall, attach the walls/roof to the new framework, then cut out the bottom part of the box. Then build the new front wall and floor of the cabover, and just slide the modified box forward and bolt it back down. My thought was that if I was careful in the removal process, most of the existing trim could be reused in a new location. For example the big aluminum extrusion on the bottom that you cut off would be the right size to just move up to the bottom of the cabover. Same for the curved pieces on the front of the box. However that stuff can be purchased new, any major city has a dealer for pretty much every brand of truck box manufacturer and they can order you all the replacement parts, which they have available for crash repairs and what not. I have a friend that works at a local dealer that informed me of all that when I was thinking this way.

I have another friend who build a toter similar to what you are doing, and he was also able to reuse the parts of the sidewall (cut off when you shorten the back) to build the new solid back wall of the toter. Worked good, everything matched up nice that way trim wise, including the "patina" as in every white truck is faded to some extent, and if you mix in new materials it will never match up right unless you paint the whole thing when you are done. He just shortened the box to the length where he could pull his fifth wheel trailer, but then decided to add the cabover later. That was a mistake, more work than it was worth. Should have done it your way and been less work and look better.

Using the 1.5" steel tubing for your internal framework would have the benefit of matching up to inexpensive 2x2 or 2x3 (laid flat) framework you use throughout the rest of the box for your insulation and wiring.

I ended up using surplus diamond plate curved corners and cast aluminum endcaps when I built my box. My stuff was surplus trailer hardware from Johnson's Surplus and Bontragers in Elkhart. A little tricky to figure out how to build the structure properly to work with the curved corners the first time, but worth it for a professional look.

You may want to also have your plan figured out for lower toolboxes and/or side skirtying at the same time if you want it to have that true toterhome look. For example that way you can run the same solid corner piece all the way to the bottom of the side skirt for a nice continuous look.
__________________

hot rod is offline   Reply With Quote
Old 01-10-2015, 10:55 PM   #3
Junior Member
 
Join Date: Nov 2014
Location: benton city
Posts: 3
Default

Well we went ahead and started out on our project.. starting with the overhang . We've assembled and welded 2x2 angle iron to the exterior walls attaching them with 3/8 1/4-20 counter sinking bolts. We span 1x1 .120 wall from left to right with 1' spacing. The over hang is 4' to the mating wall. With all that done tomorrow we plan to cut the box and have the over hang finished with the back wall. Pictures to come..
Attached Thumbnails
IMG_224709700955481.jpeg  
chris.pdp is offline   Reply With Quote
Old 01-11-2015, 11:09 PM   #4
Junior Member
 
Join Date: Nov 2014
Location: benton city
Posts: 3
Default

Update..

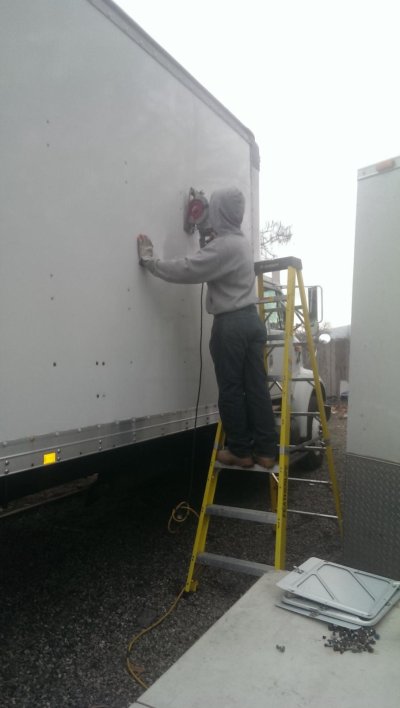
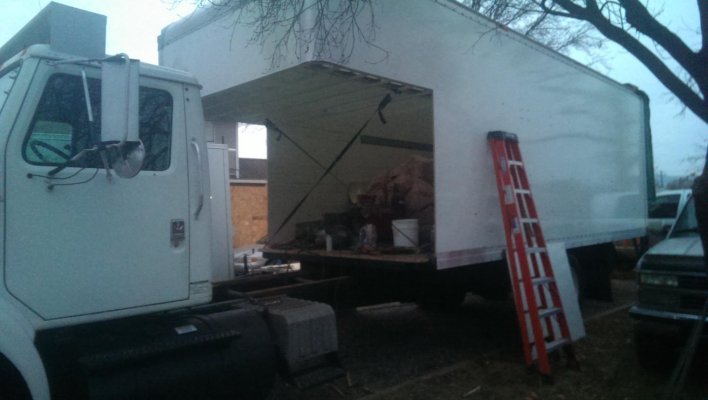
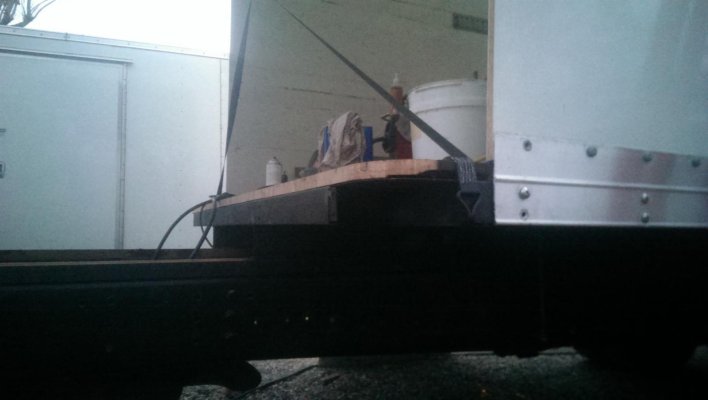
Today we finished up a couple braces and cut the box. The frp and aluminum were real simple to cut without having to worry about pinching ,but the floor is another story. The I beam must have had a bow in it and been under tension cause it closed down like a clam as soon as we got to the ends. One thing we did not see coming is as soon as you cut the front panel the box starts swaying pretty easily.. So any bracing should be done prior to this..

We ended up keeping the front panel and aluminum corners together to reattach to the origanl c channel pushed back to the new edge. trimmed the floor to match and rewelded in place. Made good progress hoping to get it closed back in next weekend. What kind of fasteners are people using to attach frp to the bottom of the attic frames ?
Attached Thumbnails
IMAG0070.jpg   IMAG0072.jpg   IMAG0073.jpg  
chris.pdp is offline   Reply With Quote
Old 01-12-2015, 04:01 PM   #5
Senior Member
 
Join Date: Jan 2011
Posts: 527
Default

check out kenn's build thread under coach in the making:

http://www.truckconversion.net/forum...-welding-6041/

he used frp panels over his framework, and does absolute top notch work.
hot rod is offline   Reply With Quote
Old 01-13-2015, 12:34 PM   #6
Senior Member
 
Bob86ZZ4's Avatar
 
Join Date: Feb 2009
Location: St. Paul, MN
Posts: 1,819
Default

I'd consider some sort of drain in the bottom of the attic. My coach they used the wrong kind of clearance lights and they allowed water into the cavity and it sat on the top of the bottom of the overhang. It percolated through the aluminum a bit. I put in different lights and I also store mine inside so I haven't had a problem since. But I should probably figure out how to put some sort of drain fitting up front there on the bottom to allow water out if it gets in there. My philosophy with water is usually "it's going to get in there no matter how hard you try to keep it out, so do something to get it out as efficiently as possible."
__________________

__________________
'03 Freightliner FL112, 295" wheel base, with '03 United Specialties 26' living quarters, single screw, Cat C12 430 h/p 1650 torque, Eaton 10speed , 3.42 rear axle ratio
Bob86ZZ4 is offline   Reply With Quote
Reply


Posting Rules
You may not post new threads
You may not post replies
You may not post attachments
You may not edit your posts

BB code is On
Smilies are On
[IMG] code is On
HTML code is Off
Trackbacks are On
Pingbacks are On
Refbacks are On


Powered by vBadvanced CMPS v3.2.3

All times are GMT -5. The time now is 03:14 AM.


Powered by vBulletin® Version 3.8.8 Beta 1
Copyright ©2000 - 2024, vBulletin Solutions, Inc.
×