What was I thinking?

solo318

Senior Member
Joined
Jul 17, 2015
Messages
127
Location
Central Florida
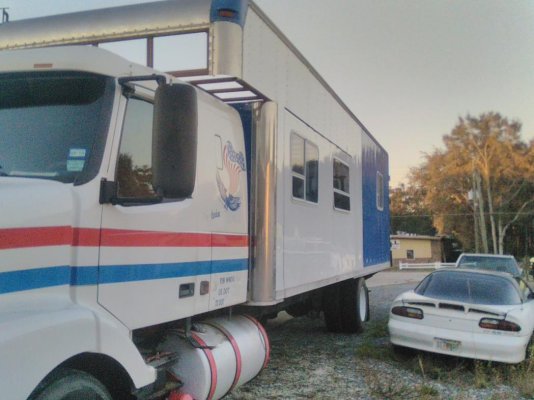
I figured it's about time to start showing progress. this is my first attempt at a build thread for any of my projects. So bear with me. It started life as a line haul truck for I believe Watkins. Was stretched and converted into a 28 ft box truck for a plant nursery. I bought it out in Arkansas and drove it all the way home with no problems at all. 315k miles, 435 n14 cummins, super 10 trans.


volvo truck.jpg
 
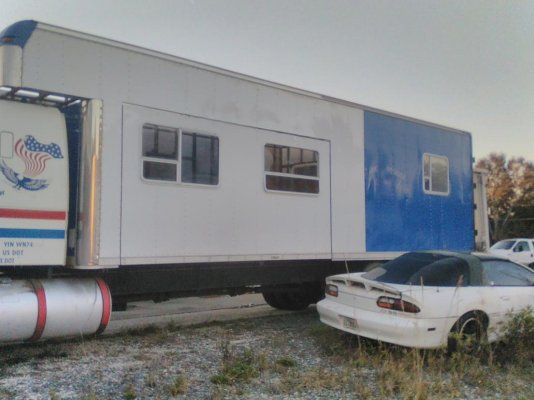
I needed to move the box forward 18 inches and add a sleeping loft for my daughter. I also needed to replace the fiberglass roof with aluminum.

20151230_081220_2.jpg

I bought an old travel trailer for the windows, doors, and the slide mechanism. and set up and framed the 12 ftx43 inch slide out.


20151230_081220_2.jpg

20151230_081000.jpg
 
I cut and spliced the top rail 9ft back from the front and spliced in a 12ft section to add the 36 inch loft. I also framed everything up with 1x2 inch 1/16th wall box tubing. Much stronger that the z studs Supreme used and still fairly light.
All of the skin that has been removed is being replaced with new aluminum. I was planning on a repaint anyway, and why half ass it at this point.
Here is a pic of the left side with the skin replaced and windows.
 

Attachments

  • IMG_20160119_173703.jpg
    IMG_20160119_173703.jpg
    96.2 KB · Views: 17
  • IMG_20160119_173650.jpg
    IMG_20160119_173650.jpg
    93.7 KB · Views: 15
You must have been thinking "This is an easy project and will be done quickly!".... Cool project and looks good!
 
Update

After finishing the left and right side paneling, I decided that roof should be the next project. My wife decided that a skylight this big was just going to leak.


20160219_142339.jpg

The new roof is rolled .060 aluminum. It is sold by the foot. This is a 35 ft roll.

20160219_142302.jpg

We used the forklift to lift it up to the roof. Centered it up at the front and let it fly. Wish I had a video, It was cool to watch. I then welded up a quick "attachment point" to the fork lift and clamped the rear of the roof to it to "stretch it" This will keep it from billowing as you go down the rood.

20160223_105550.jpg

Once stretched. We used new J molding and buck rivets to fasten it to the top rail. We used butyl tape between the roof and the top rail. We used grey Manus to seal the J molding. This should be a lifetime roof.

20160224_092636.jpg

The walls of the truck body are actually held together by the roof. Without it they are very flimsy and sway back and forth. The body is much stronger now.
 
I bought our local harbor freight (I didn't want to leave my nice ones out in the weather)out of vice grips twice. The lady said they're ordering system was based on sales. I think they are going to be overstocked shortly :)
 
Status report Mr Sulu

After much work with no noticeable progress. I finally have some pictures.
Now that the roof was on. I had to finish the bunk area above the cab. I slid the box back 4 ft. And installed a sheet of 16 gauge stainless to the bottom of the bunk area.

20160301_183841.jpg

20160301_183909.jpg

20160301_184030.jpg

Once we got that in place I got a sheet of 16 gauge plain steel and built the front of the box.
20160529_175100.jpg
Then I gutted the sleeper and cut my hole.
20160529_175106.jpg
 
After dodging some serious rain storms. we primed and painted the rood of the cab, the back of the cab and the front of the box. Once I join the two together there would be no way to paint them.
20160530_125636.jpg

20160530_125645.jpg

20160530_125659.jpg

20160530_125707.jpg
 
Once the paint dried (and 5 more inches of rain) We moved the box back forward and bolted it down for the last time ( I hope). Here is how she sits now. Awaiting the sleeper boot.

20160531_091903.jpg
 
40ft nose to tail. 29 ft box with a 3 ft attic. 102 inches wide.

ok well not all that long....many are 45 feet (we are 42).

your width is standard, i suggest measuring to the mirrors....just so you know (in case you get into a tight spot.

I have some reminders on both sides of the overhead console...i tell my passengers they have some responsibility to help and watch out too.


Try RV LIFE Pro Free for 7 Days

  • New Ad-Free experience on this RV LIFE Community.
  • Plan the best RV Safe travel with RV LIFE Trip Wizard.
  • Navigate with our RV Safe GPS mobile app.
  • and much more...
Try RV LIFE Pro Today
Back
Top