 |
|
 09-20-2014, 08:50 PM
|
#1
|
|
Senior Member
Join Date: Sep 2014
Location: Glendale
Posts: 243
|
 I get a "DO OVER! "
Hello all.
This will be my DO OVER build. This truck was started sometime in 2002. At the time I was in Offshore Racing and wanted a truck that would go up the Grape Vine ( I 5) faster than the gas trucks I was using. I would get passed by almost everything !
But their were, what looked to be loaded semi's that must have been doing 65 +.  I knew that was the way to go.
So I started looking for a tractor. Then I would find a box and stretch the chassis to fit.
As it turned out their was a semi that was used in a Movie ( 8 legged freaks ) that was for sale. Think it was $4000 but their was a little fire damage ?

But all in all it could be fixed. Only takes money !  Their were some magnesium parts that helped the fire keep going. Don't think think the Globe,AZ fire department was ready for that ! 
|

|

|
 09-20-2014, 08:52 PM
|
#2
|
|
Senior Member
Join Date: Sep 2014
Location: Glendale
Posts: 243
|

Cab was ok but every thing under it was melted,big time.
So on with the story. Fixed the semi problems from the fire and found a box and got some used rails from another wreck to stretch the chassis to fit. Started the box work,sewer system, Gray water, water . Wiring A/C and DC in the walls,all the stuff . Oh and the new drive shaft system.

Here is a photo of the box van it would replace.

Then I got some very bad news ! My Dad passed ! I felt like I was hit by a TRUCK ! Then 60 days later my Mom was gone also !
So I made the first trip with the truck to close out my family's home. A dark time and a long trip. 4500 miles and I had never driven a truck of that size before. Steep learning curve !
After all of this I started looking at my life and started to pull back. No more Offshore Racing , Road Racing just stopped ! Every thing went on hold.
Randy
__________________
|

|

|
 09-20-2014, 09:12 PM
|
#3
|
|
Senior Member
Join Date: Sep 2014
Location: Glendale
Posts: 243
|
Time heals all ! And I'm starting the build back up. 
She is a 1992 International 9600 COE. 350 Big Can Cummins with only 880,000 miles +-. 225 HP ( I'm told that can be upped but going to get my Family's stuff ,never felt like I needed more.) We will see. It scaled at 17,800 # with the stuff and pulling a car trailer and a car on it. She is a "X" McLane truck and went from Phoenix to some where in Texas its hole working life. Has a 10 speed trans.
This the general plan. Add 4 slide outs and finish what I started.

Here is a photo take today after being washed and sitting for 8 years ! (I do run it once a month. ) And I have a solar charger on the battery bank.

In the photo is my Ranger 20' that will spend some time behind her. And in the plan is a lift to carry a Polaris RZR 800 for getting around when on the road.
Randy
|

|

|
 09-21-2014, 09:58 AM
|
#4
|
|
Senior Member
Join Date: Apr 2012
Location: Elyria
Posts: 108
|
Welcome back and good luck. Above all, have fun!
|

|

|
 09-21-2014, 11:30 AM
|
#5
|
|
Senior Member
Join Date: Sep 2014
Location: Glendale
Posts: 243
|
Thanks RLP. Been looking over your build. Very nice !
Randy
|

|

|
 09-23-2014, 09:31 PM
|
#6
|
|
Senior Member
Join Date: Sep 2014
Location: Glendale
Posts: 243
|
Been pulling the old panels to see what it will take to install the slide outs.
Think I will add a steel frame for the opening and bond and rivet it ? After looking a other builds I think maybe I should have not used a old 20' box. But that is what I have and it will do. LOL
Also have a shot of the pass through. With my truck being a COE the pass through is part of the box.


Randy
|

|

|
 09-23-2014, 09:51 PM
|
#7
|
|
Senior Member
Join Date: Sep 2014
Location: Glendale
Posts: 243
|
Also been looking at Barker Cog slide outs. Ideas ? anybody worked with them ? The others are slow to return calls. It is making me wonder ? Guess I'm to small time ? Only need 4 slide out systems. 

Also what skins for the slide outs ? Alum or Fiberglass ? The frame for the slide outs will be steel 1 1/2" x 1 1/2" 16 ga. tubing.
Could anybody post some photos of the building of the "box" part of the slide out ?
Barker Slideouts
Randy
|

|

|
 09-23-2014, 11:44 PM
|
#8
|
|
Senior Member
Join Date: Jan 2011
Posts: 527
|
I would definitely be planning on additional structure in the walls around the slides. I looked at box trucks as a potential basis for a build like yours, and the wall constructions seemed geared more towards light weight than max interior width than strength. I'm just assuming the weight of the slide out hanging 3' off the side of the truck has to put serious strain on wall supporting it. Along the same vein I'd be thinking light weight construction on the structure of the slide itself. Being basically a rectangular box it should be pretty strong just on the geometry and not have to get carried away with heavy tubing.
|

|

|
 09-24-2014, 12:46 AM
|
#9
|
|
Senior Member
Join Date: Sep 2014
Location: Glendale
Posts: 243
|
Hot Rod, What I saw in the Liftco wall mount got me thinking it may not be the right unit. The van box I have is good for keeping things on a pallet from moving around but their is not much their.
But using the fixed mount ,like the Barker. It would put little load on the wall. If I see it right the load would pass,for the most part into the floor and then to the chassis through the arms? Well I think ?
The frame of the floor of the box is a steel grid made up of 'I' beams on 16" centers. Think they 3" and are welded to the 2 center ,6" 'I' beams that run the length of the box. The floor of the box is 1 1/4" hard wood. Also the center wall will be load bearing. Should keep the center of the van box from spreading. A nother idea ?
With some planning and luck I should be able to mount the slide rails in between them ? Well at least that is the plan .
Will know more when I get the drawings and spec. from them.
Randy 
|

|

|
 03-18-2015, 02:58 PM
|
#10
|
|
Senior Member
Join Date: Sep 2014
Location: Glendale
Posts: 243
|
Well I'm back at it.
Going to pull back from the slide-outs . Poor input from manufacturer . I will just design and build one later . And their $$$$ ! Over priced for my way of thinking.
Been talking with my Wife and she felt the original setup was to small.( Food prep area) And when I started it was going to be used for short trips. (not very far-sited ).
Also going to move it to the other side of the box. With it moved my plan is to make the driver side a slide out in the future.Thinking a 8' x 36" x 6'6" +- ?
Pulled the walls and then on to the floor and the old counter.
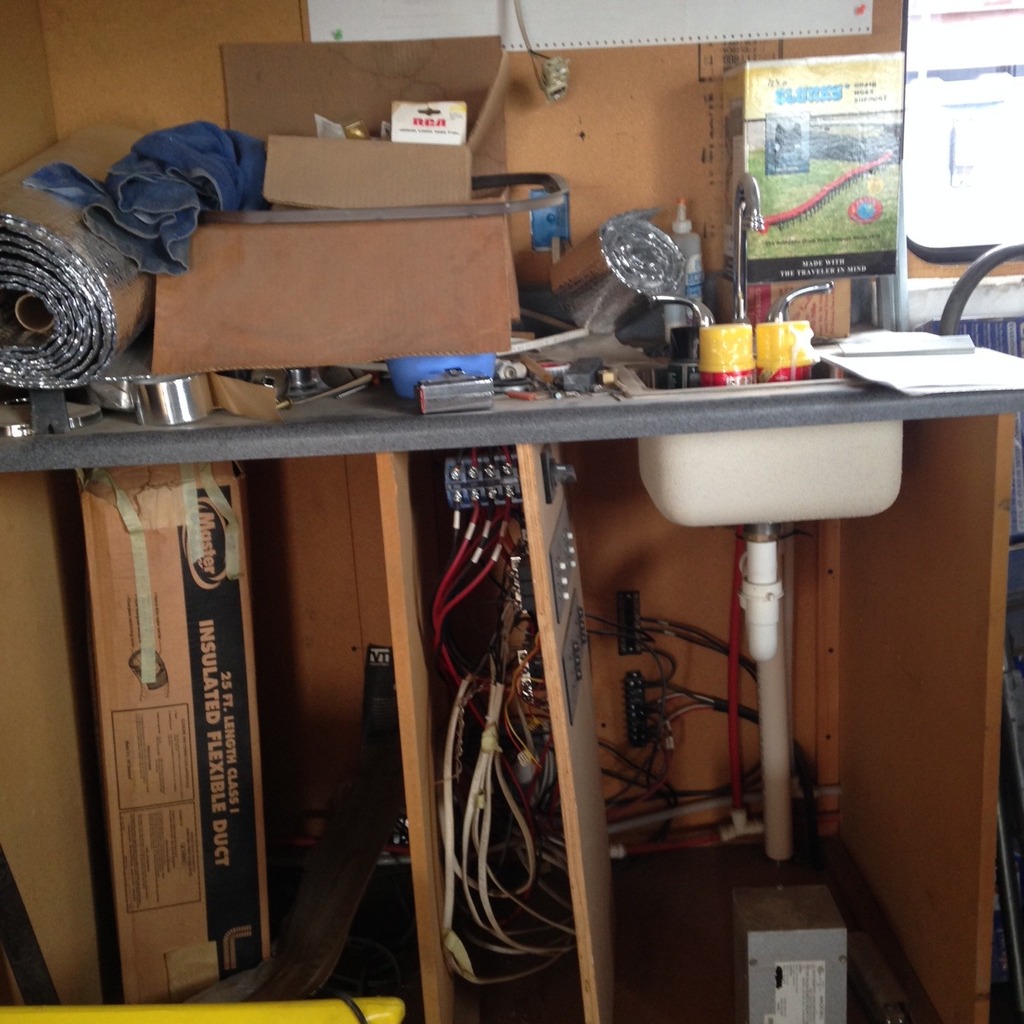
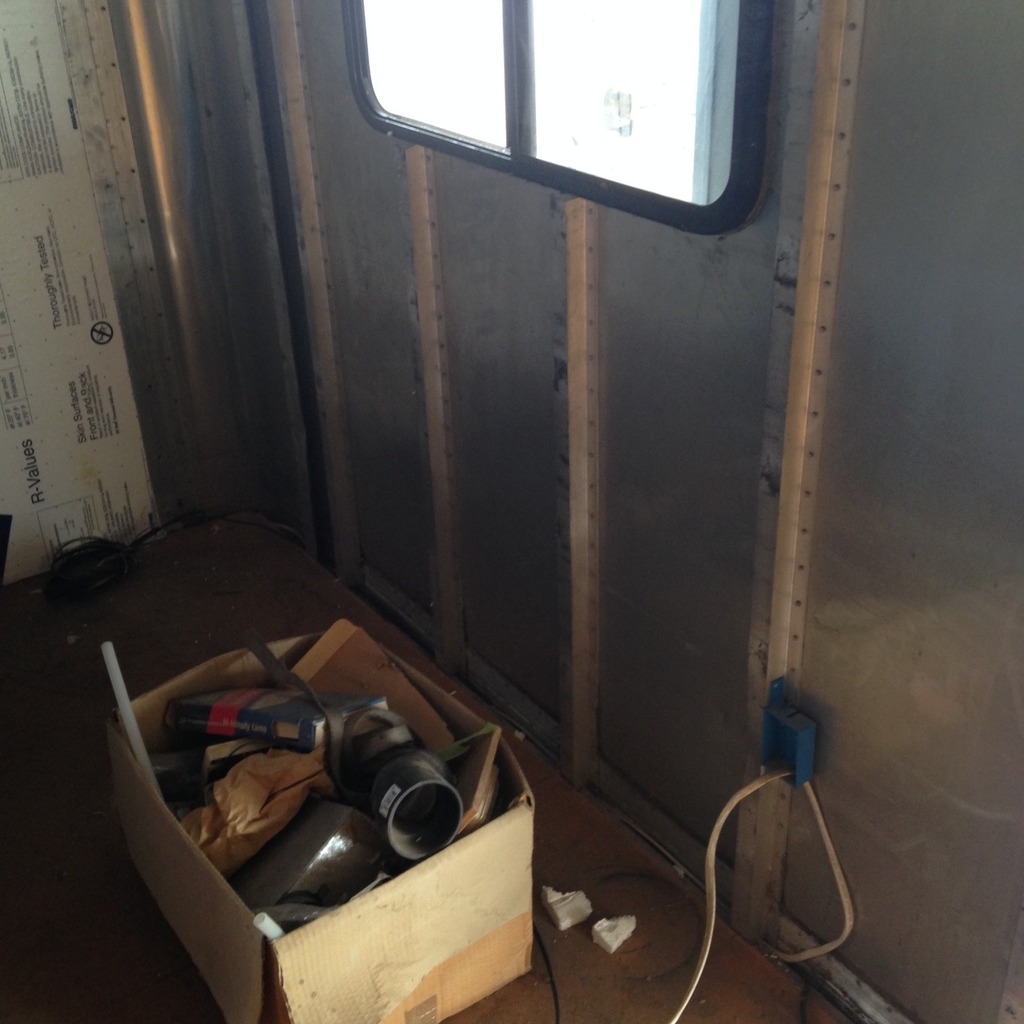
I never really finished the inside so some things need to be redone.But its all good . I have a better idea now which will help. 
Randy
|

|

|
 03-19-2015, 04:21 PM
|
#11
|
|
Senior Member
Join Date: Sep 2014
Location: Glendale
Posts: 243
|
Go all the temp counter our and ready to pull the floor cover. Going to lay down a different cover. Some kind of hard wood ?
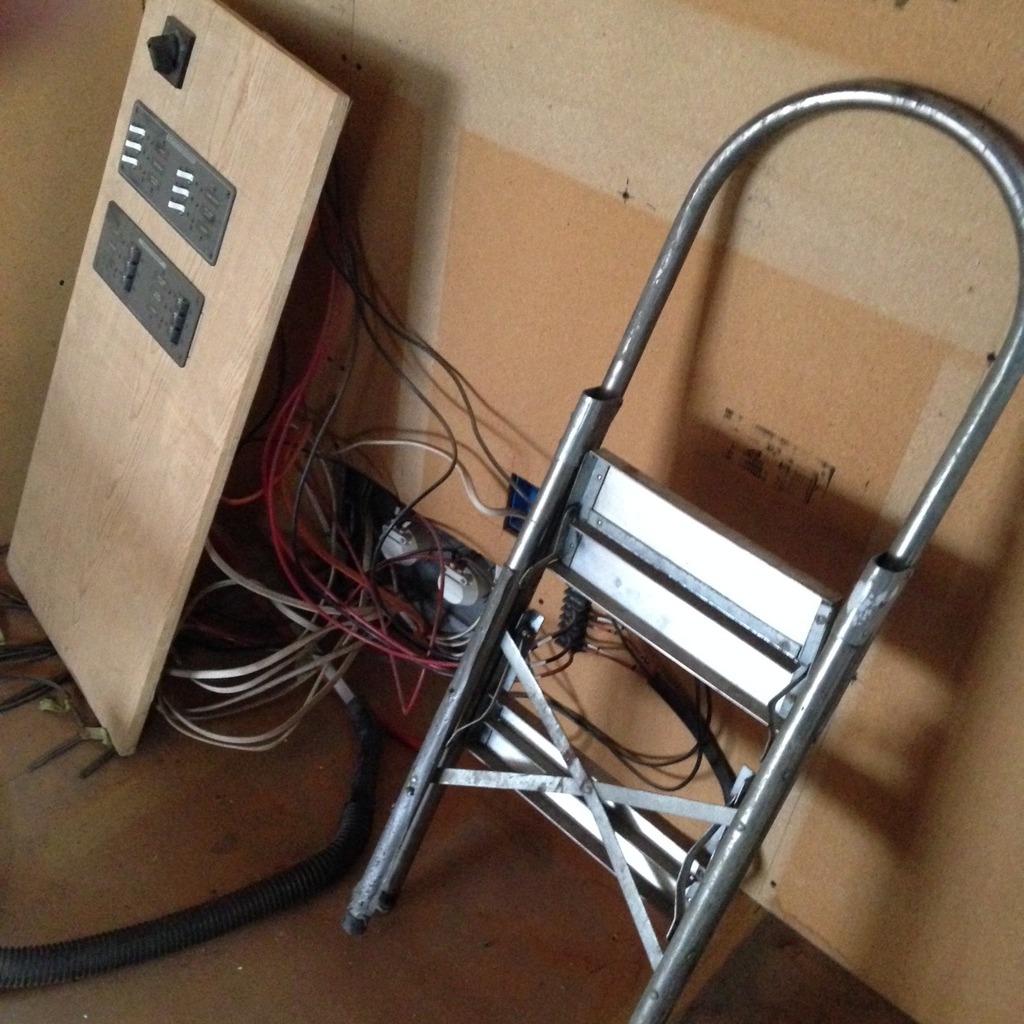
Left the wires all installed so I can use the out lets till is time to rewire.
What is good to use to make walls ? 1/8" paneling ? What have you used ?
Randy
|

|

|
 03-19-2015, 06:56 PM
|
#12
|
|
Member
Join Date: Jul 2012
Posts: 57
|
I've seen people use 1/8 or 1/4 paneling. Depends on whether you're going for a solid feel or reduced weight. I'm using 3/8 on the build I've got going now.
|

|

|
 03-19-2015, 11:00 PM
|
#13
|
|
Senior Member
Join Date: Sep 2014
Location: Glendale
Posts: 243
|
Here she is in the bay.

Been working on the side windows. The wall moves way to much so I am going to put a reinforcement at the top and bottom to tie the cut uprights to the uncut ones.
The 1x2 is where the tubing will go.I will rivet/glue the tube to the skin of the box.

Randy
About the walls. I think I will go with 1/4" of something.
|

|

|
 03-21-2015, 03:00 PM
|
#14
|
|
Senior Member
Join Date: Sep 2014
Location: Glendale
Posts: 243
|
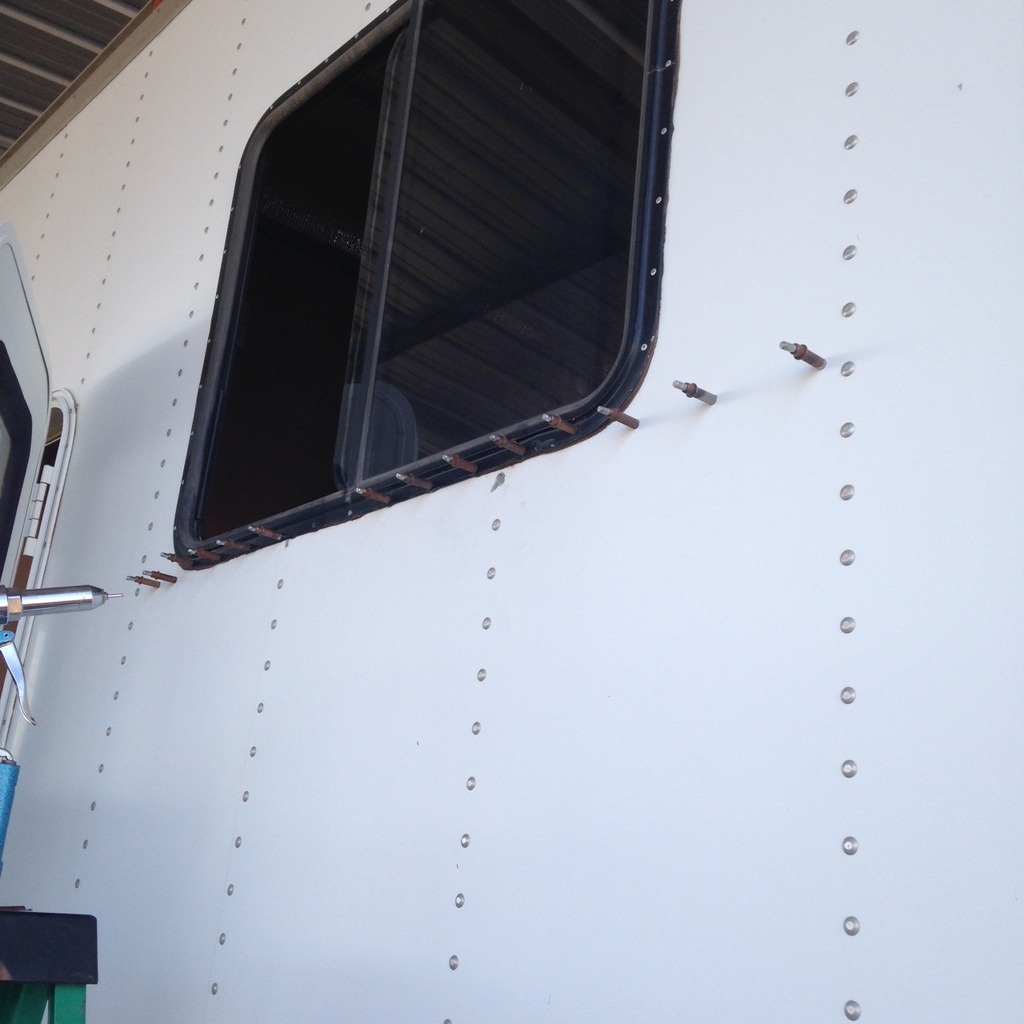
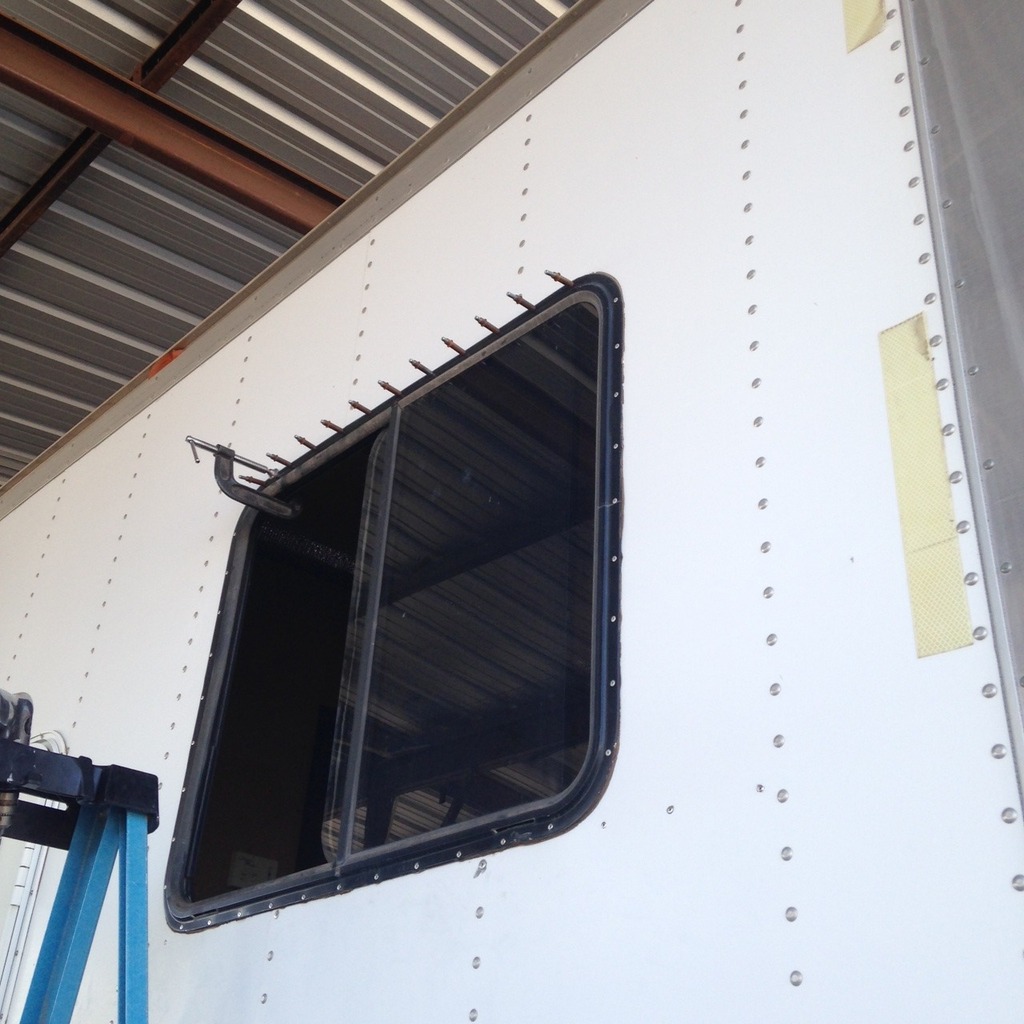
Got the reinforcement installed on one window.
You cut out the part. Install and drill all holes. After drilled remove and install sealer/bounder and hold in place with clecos and rivet.
I used SS rivets , the thinking is that the new steel rinforsment would eat up a Alum ?
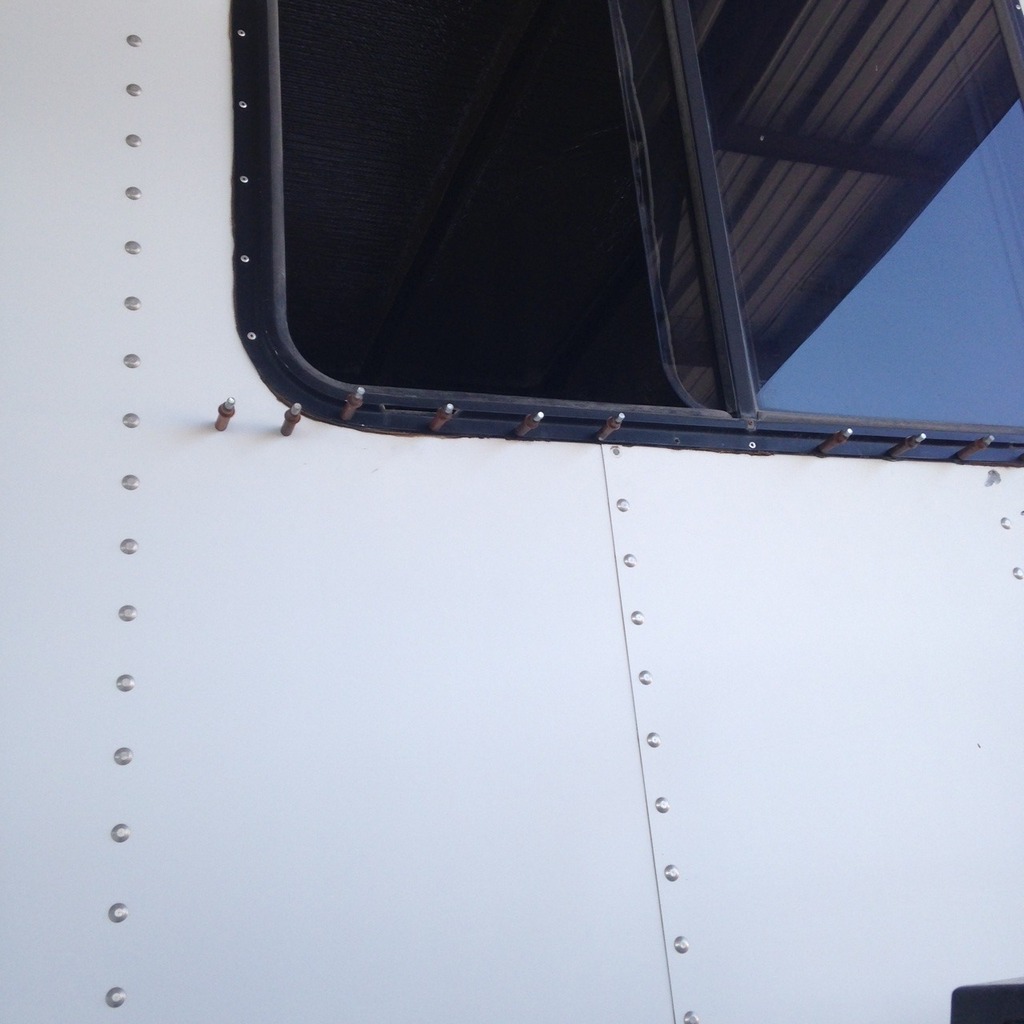
Randy
|

|

|
 03-21-2015, 03:15 PM
|
#15
|
|
Senior Member
Join Date: Feb 2009
Location: St. Paul, MN
Posts: 1,819
|
Looks good, Randy. Keep the posts/pictures coming. I love watching other people build stuff since I'm not capable of building anything myself.
__________________
'03 Freightliner FL112, 295" wheel base, with '03 United Specialties 26' living quarters, single screw, Cat C12 430 h/p 1650 torque, Eaton 10speed , 3.42 rear axle ratio
|

|

|
 03-21-2015, 07:02 PM
|
#16
|
|
Senior Member
Join Date: Sep 2014
Location: Glendale
Posts: 243
|
Hi,Bob.
You bet, I may not do it the right way but I try.
Anybody that has a better way, let me know ! I can always use help.
Randy
|

|

|
 03-21-2015, 07:39 PM
|
#17
|
|
Senior Member
Join Date: Jan 2011
Posts: 527
|
I've always used 3/8" plywood on the walls of my stuff. Not that much more weight in the larger scheme of things, and makes the wall nice and solid. Plus heavy enough to screw things to the wall and be sturdy.
|

|

|
 03-21-2015, 08:50 PM
|
#18
|
|
Senior Member
Join Date: Sep 2014
Location: Glendale
Posts: 243
|
Wish I could find some "good" 3/8" ply. The big box stuff looks like hell.
But your right. I will keep looking.
|

|

|
 03-22-2015, 11:18 AM
|
#19
|
|
Senior Member
Join Date: Sep 2014
Location: Glendale
Posts: 243
|
Here are some shots from the in side. The flash on my phone cant outdo the light from the window. Need to take a real camera ?
The glue is called metalbond. I used denatured Alcohol to clean things up before installing.


Randy
|

|

|
 03-23-2015, 10:29 AM
|
#20
|
|
Senior Member
Join Date: Mar 2015
Location: Cincinnati
Posts: 146
|
I like your changes, and keeping the wife happy is always a good thing!
The metal bonding adhesives are pretty amazing how strong the bond is, don't think you will have any problems. A little extra reinforcement never hurt.
On the SS vs steel rivets. From a galvanic corrosion standpoint both are "protected" by the alum, or in technical terms the alum is anodic to the steel or SS. But for any real corrosion you have to have an electrolyte, usually water serves this purpose, and so between the sealer and the coated alum frame you will not have much chance. The bigger advantage is the SS will not rust due to general corrosion, or just basic corrosion of the rivet itself. The SS will stay shiny, whereas over time the steel could get some rust.
__________________
|

|

|
 |
|
 Posting Rules
|
You may not post new threads
You may not post replies
You may not post attachments
You may not edit your posts
HTML code is Off
|
|
|
|
 » Recent Threads
 |
|
|
|
|
|
|
|
|
|
|
|
|
|
|
|
|
|
|
|
|
|
|
|
|
|